- Calacatta Slab 1200×120015 slabs
- Porcelain 600×600 Grey Matt20 boxes
- Tile adhesive 20 kg30 bags
Guide
How to use Lotwisely
Step by step, from your first sign-in to packing on the phone, pro formas, bills and the cash-up. The buttons named here are the ones you'll see in the app.
Updated November 2026
Every Settings screen, one by one, with pictures →
The whole guide on one page — choose “Save as PDF” to keep it.
Setting up, selling, buying and the office side of packing. For the warehouse phone, see .
How to use Lotwisely · lotwisely.com/guide
Start here
Sign in, find your way around, and what to look at each morning.
Getting started
Lotwisely runs in your web browser on a computer, tablet or phone. There is nothing to install.
Try it with the sample company
- Go to app.lotwisely.com and choose Create an account. Enter your email and a password (8 characters or more).
- Open the email from Lotwisely and click the link to confirm your address.
- Sign in and press Open a sample company. A tile shop called Harbourside Tiles (sample) is set up for you.
- Choose Sydney or Melbourne — the sample has two branches — and click around. The sample is yours alone.
Set up your own company
- On the first screen after signing in, enter your Company name, a First branch code (2–6 letters, e.g. SYD) and a Branch name.
- Press Create company. You are the Owner.
- Go to Settings → Company details and fill in your company details — they are printed on your invoices.
- Add Locations, then Products, then Customers and Suppliers.
Install it on your computer
Lotwisely can open in its own window, with its own icon on the taskbar or Dock, like a desktop program. It is the same Lotwisely as in the browser — always up to date — and it needs an internet connection.
Chrome or Microsoft Edge (Windows and Mac)
- Open app.lotwisely.com in Chrome or Edge and sign in.
- Chrome: click the install icon at the right end of the address bar (a small screen with an arrow), or open the ⋮ menu → Cast, save, and share → Install Lotwisely.
- Edge: open the ⋯ menu → Apps → Install Lotwisely.
- Press Install. Lotwisely opens in its own window.
- Windows: right-click its icon on the taskbar → Pin to taskbar. Mac: it is in Launchpad and the Applications folder; drag it to the Dock to keep it there.
Safari (Mac)
- Open app.lotwisely.com in Safari and sign in.
- Choose File → Add to Dock, then Add.
The menu and how the work flows
The menu follows the work. Sales and Purchasing mirror each other: a quote becomes a pro forma or an invoice, goes out as a delivery and is paid; a purchase order is received, becomes a bill and is paid.
Coastal Homes · 3 townhouses, 40 Dune Rd
1 / 6
The builder asks for a price
A quote is only a price. Nothing is held — the slabs are still free for anyone who walks in.
Stock1 square = 1 slab
Calacatta Slab 1200×1200 · lot C77 · Vein B
freeheld for the pro formaon an invoicedelivered
Deposit held$0.00
Sales$0.00
Money in$0.00
What is in each group
- Dashboard and Today — the big picture, and what is waiting in your branch.
- Sales — Sales hub, Point of sale, Quotes, Pro formas, Invoices, Deliveries, Delivery calendar, Customer payments, Gift vouchers, Credit notes, Statements.
- Purchasing — Purchase hub, Purchase orders, PO calendar, Receive goods, Bills, Invoice inbox, Supplier returns, Bill payments.
- Inventory — Stock, Products, Packing, Stock moves, Stocktake, Branch transfers, Selling check.
- Contacts — Customers and Suppliers.
- Reports — Sales, purchase and inventory reports, Cash summary.
- Settings (at the bottom, with your account) — company, invoices & quotes, locations, categories, payment methods, delivery, staff.
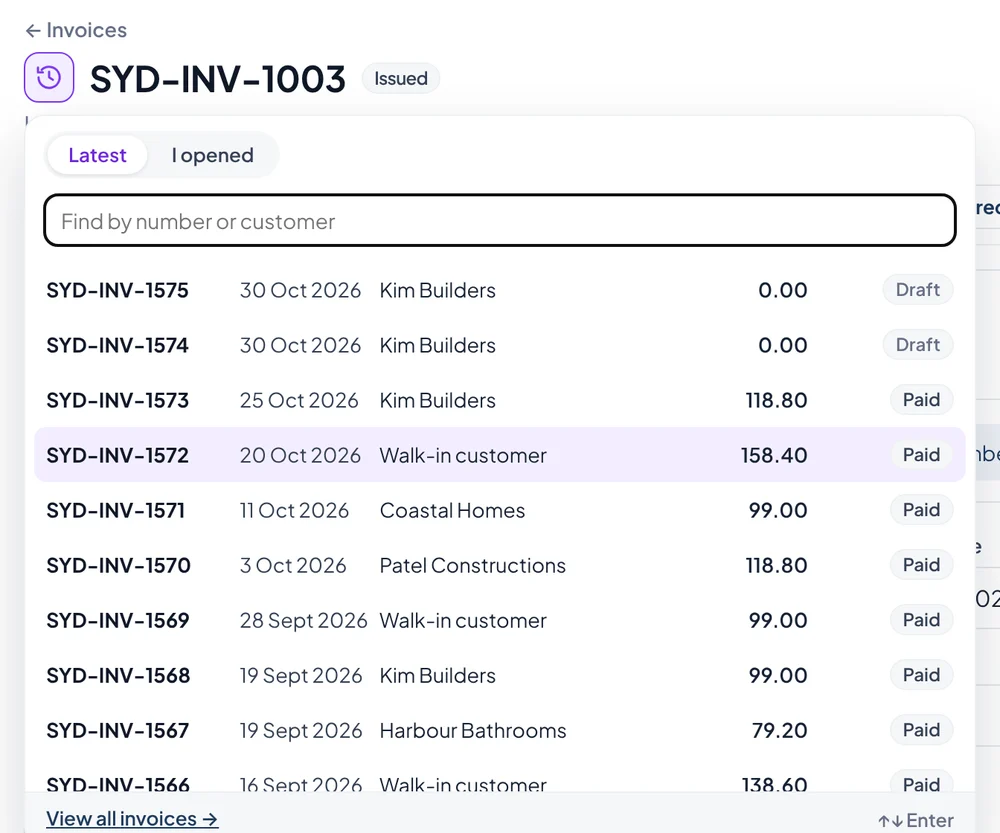
Today: what needs doing
Today collects what is waiting in your branch. On a computer, Owners and Admins start here when they sign in.
- Open Today (top of the menu on a computer; under More on a phone). The number beside it is how many things are waiting.
- Each card shows a count and up to five documents — deliveries due, invoices that need lots, back orders ready, late purchase orders, receipts in progress. Click a line to open it.
- Owners and Admins see Waiting for your approval: stock adjustments and credit notes.
- On a computer, the right-hand side shows Invoiced this month, sales per week, Owed to you and Stock at cost.
Dashboard
Owners and admins open Lotwisely on the Dashboard on a computer: how the business is doing, with the chart behind every number.
- Open Dashboard at the top of the menu. Choose All branches or your branch only.
- The cards on top: Sales this month and this financial year against the same days last year, Gross profit, what Customers owe and Stock value. Click a card for the report behind it.
- Hover a month on Sales by month for this year, last year and the change. Press + FY to add the year before.
- Further down: the running total, gross profit by month, money in by payment method, the top 5 customers or products this month, stock value at each month end and Stock health (selling, no sale for 90+ days, remnants).
Insights every morning
- Open Today. At the top, Insights lists what Lotwisely found this morning for your branch and the whole company: Act now, This week and Good to know.
- Read the AI summary first — a few sentences on what matters most. Every number in it comes from the list below.
- Press Open → to go to the product, invoice, customer or report behind an insight.
- Done with one? Hide for a week or Hide for good. “hidden · show them again” at the bottom brings them back.
- Owners and Admins: change the numbers it uses in Settings → Insights — target margin, weeks of stock an order should cover, days before stock counts as slow, when to follow up quotes — then press Work them out now.
Set up your company
Company details, shelves, staff, products, customers and suppliers.
Company settings
Everything here appears on tax invoices, pro formas, quotes, packing slips, purchase orders, credit notes and statements.
Company
- Open Settings → Company details.
- Fill in your trading name, legal name and business number (ABN in Australia — a tax invoice needs it), address, phone and email.
- Upload your logo (PNG or JPG).
- In Settings → Lot wording, choose what your staff call a lot — Lot, Batch or Shade. The whole app uses that word.
- Press Save company details.
Country and money
- In Settings → Country & money, choose your Country. The currency, the tax name and rate, the start of the financial year and the labels on your documents fill in.
- Change anything that is different for you — e.g. Sales tax is called VAT, Standard tax rate (%) 20, Financial year starts in April.
- Press Save country and money.
Daily summary email
- In Settings → Daily summary email, choose the hour in Send it at (your company’s time zone). It starts at 7 am.
- Press Save. The status shows Running.
- Press Send me one now to see what it looks like in your inbox.
Invoices & quotes
- Open Settings → Invoices & quotes.
- Under How to pay, add your bank, bank code (BSB in Australia) and account, and your Payment terms (days).
- Add a short note for the bottom of invoices and quotes, and your Terms and conditions — at the bottom, pinned to the foot of the last page, or on a page of their own.
- Under Print layout, keep Landscape (wide) — code, lot, packs and price each in their own column — or choose Portrait (classic) for invoices, pro formas and quotes.
Payment methods
- Open Settings → Payment methods.
- Rename, reorder, add or remove the ways you take money — e.g. Cash, EFTPOS, Bank transfer, Amex. They appear in this order on payments and in the Cash summary.
- Press Save payment methods.
Delivery: freight companies and colours
- Open Settings → Delivery.
- Press Add freight company (or click one to change it): name, phone, booking email and its colour on the delivery calendar.
- Owners and Admins can also pick the colours for Pickups and Our own truck.
Branches
Each branch — a shop, a showroom or a warehouse — has its own shelves, stock and document numbers. Products, customers and suppliers are shared, and everyone can see every branch’s stock.
- Owners and Admins open Settings → Branches and press Add branch.
- Type a Code (2–6 letters or numbers, e.g. MEL) and a Name; an address and phone are optional. A first shelf is made for you (MAIN unless you type another).
- Press Add branch. Then add its shelves in Settings → Locations, give people access in Settings → Staff, and switch to it with the branch picker at the top left.
Sales tax in the US and Canada
Where the rate depends on where you sell, you keep your own list of rates. Lotwisely never looks a rate up — it uses exactly what you type. In Australia, New Zealand, the UK and other one-rate countries you don’t need this: each product keeps its own rate.
- In Settings → Country & money choose United States. Lotwisely sets Sales tax added at the end and starts your rate list with Sales tax at 0%. A yellow bar asks Owners and Admins to set it until you do. (In Canada, add your rates the same way in Settings → Tax rates.)
- Open Settings → Tax rates, press Edit and type the rate you charge — state, county and city added together, e.g. 9.5 or 8.875. Add Parts (State, County, City…) if you want them for filing; they must add up to the rate.
- Add a rate for each place you sell or deliver to (e.g. Los Angeles, Pasadena). Under Rate at each branch choose what each store charges over the counter.
- Under Rate for each delivery zone give a zone its rate. A quote, pro forma or invoice whose Ship to falls in that zone takes it; otherwise it takes the branch rate.
- On a quote, pro forma or invoice the Sales tax bar shows the rate and where it came from. Pick another rate by hand, or Automatic to go back.
Locations
Locations are racks, bays or areas inside a branch. Stock is always kept by lot and location.
- Open Settings → Locations and press Add location.
- Choose the branch, enter a short Code (e.g. A-01) and a name, and press Save.
Staff and roles
Only the Owner adds and removes staff. Type their email: someone who already uses Lotwisely is added at once; anyone else gets an invitation email.
- Open Settings → Staff, type the person’s email, choose a role and a branch, and press Add.
- Already on Lotwisely? They are in your company straight away. New to Lotwisely? They get an email with a Join button.
- They press Join, choose a password and press Create account and join — there is no confirmation email to wait for. They land in your company, not in a free trial of their own.
What each role can do
- Owner — everything, including staff and company settings.
- Admin — settings, products, locations and approvals in all branches.
- Sales — quotes, pro formas, invoices, choosing lots, deliveries, payments, credit notes, bills (in one branch).
- Warehouse — receiving, deliveries, moves and stocktake (in one branch). Warehouse staff never see prices, bills or money.
- Warehouse manager — everything Warehouse does, plus what your Packing rules keep for a manager: packing without scanning, and confirming packing and sending goods out (in one branch).
- Viewer — look only, including reports.
- Driver — only their own deliveries, on the phone, with no prices (in one branch). See Drivers and proof of delivery.
Invitations waiting
- Open invitations are listed above the staff, with the day they were emailed and until when they are open (14 days).
- Press Resend to email it again, or Cancel to stop it.
- Made an account but never confirmed the email? The row says so and offers Send join link — the new link finishes it in one step.
Two-step sign-in
After the password, Lotwisely also asks for a 6-digit code from an app on the phone — so a stolen or guessed password is not enough. Each person can turn it on; the Owner can make it a must for the whole team.
- For yourself: open Settings → My settings → Two-step sign-in and press Turn on two-step sign-in.
- Install an authenticator app on your phone if you don’t have one — Google Authenticator, Microsoft Authenticator or the one in your password manager. Scan the QR code with it (or type the key shown under it).
- Type the 6-digit code the app shows and press Turn on two-step sign-in. From now on a new device asks for the code after your password.
- For the team (Owner): sign in with your code first, then open Settings → Staff and choose under Two-step sign-in for the team: Each person decides, Owners and Admins, or Everyone in the team.
- Lotwisely lists who hasn’t set it up yet and asks you to confirm. Those people see a short setup screen the next time they open Lotwisely — in the browser or the phone app — and can’t open anything until they finish. Set up: 7 of 10 shows how far the team is.
- Lost or new phone: press Reset 2-step next to the person in Settings → Staff. Their old phone stops working for Lotwisely, they are signed out on every device, and they set it up again with the new one.
Devices signed in
See which browsers and phones each login is used on, so you know when a password is shared. Owners and Admins only.
- Open Settings → Staff. The Signed in on column shows how many devices each person used in the last 30 days, e.g. 3 devices. Orange means more than three.
- Press the number to see each device: Chrome on Mac, iPhone 15 · app — when it was first used, when it was last used, and the app version.
- A device used for the first time in the last 7 days is marked New.
- When a login is used on a new device, Owners and Admins get a notification on their phone: 📱 New device: mia@….
- Someone shouldn’t be in? Remove the person from Staff, or sign that login out everywhere — see Kick someone out.
Kick someone out
Someone left, a phone was lost, or a password was shared? Three ways to stop a login — each takes effect the moment that screen opens another page.
- A person who left: open Settings → Staff and press Remove on their row. From that second the database gives them nothing of your company. Their screen says You’re no longer part of <your company> as soon as they open another page, and your company is gone from their list.
- One device only (a shared computer, a phone that should no longer have it): in Settings → Staff, open the person’s devices and press Sign out this device. That device goes back to the sign-in screen when it opens another page; their other devices stay signed in.
- Your own login on another device (a lost phone, a computer that isn’t yours): open Settings → My settings → Signed in elsewhere and press Sign out all other devices, then Yes, sign them all out. Every other browser and the Lotwisely app go back to the sign-in screen. The device you’re on stays signed in.
- Someone may know the password: change it in Settings → My settings → Password. Also sign out on all my other devices is ticked, so the other devices are signed out at the same time and need the new password.
- A shared login that several people use? Give each person their own login in Settings → Staff, then change that shared password with Also sign out on all my other devices ticked.
Products
A product is what you sell, e.g. a tile in one size and finish. Each delivery of it becomes a lot.
- Open Products and press Add product.
- Enter the SKU (your own code) and Name, the supplier’s own code in Stock no, and the Barcode (EAN on the box) if it has one.
- Choose the Kind: tracked by lot (tiles, stone, paint), stock without lots (adhesive, grout) or not stocked (freight, services).
- Choose the Unit from the list (m², m, ea, box, L, kg …). Enter the piece size or how much is in a box, pieces per box and boxes per pallet.
- Enter the sell price and cost excluding GST, and the GST rate. Tick No trade discount for products trade customers pay full price for (e.g. freight). Press Save.
Photos of products and lots
A photo of each product helps everyone pick the right box. A photo of each lot — taken when it arrives — lets you show the customer the real shade. Every plan.
Product photos
- Open Products, open the product and find Photos under the price.
- Press Add photo and choose one or more pictures (on a phone you can take one with the camera). Up to 4 per product.
- The first photo becomes the Main photo. To use another one, press Make main under it.
- Press a photo to see it big; Remove takes it away.
Lot photos — the real shade
- When a delivery is received, the received screen has a Photos column: press + on each new lot and take a photo of the boxes or tiles.
- Later, open Stock, open the product and press + in the lot’s Photos — or use the Lots table on the product. Up to 6 per lot.
- At the till, Which lot? shows each lot’s photo, so the customer can compare Shade 3 with Shade 4. Press a photo to see it big.
- On an invoice, the lot suggestions and the chosen lots show their photo too, and so does each line on Packing.
- To remove a lot photo, press the small photo in Stock, the product’s Lots table or the received screen; it opens big — press Remove. With several photos, use ‹ › (or swipe on a phone) to find the one to remove.
Photos on quotes
- Open Settings → Invoices & quotes and tick Show product photos on quotes, then Save.
- Every quote PDF now shows the main photo of each product next to its line, in the landscape and the portrait layout.
Styles, colours and sizes
A style groups the products that are one design in different colours or sizes. Each colour and size is still its own product, with its own SKU, stock and lots — a shade is the difference between lots of one product; a colour is a different product.
Set up attributes and styles
- Open Settings → Product attributes and add what makes your products differ — e.g. Colour, Size, Finish. Give an attribute choices (Matt, Gloss, Polished) if only those are allowed; leave it empty for any text.
- Tick Print it under the line on an attribute to show it on quotes, invoices and purchase orders (it is left out when the product name already says it).
- Open Settings → Styles and press Add style — e.g. “Urban Porcelain”, code URB. Or add one from a product’s Style box.
- On each product choose its Style and fill in its Colour, Size … Or bring them in with Import: a style column and one column per attribute.
The colour × size grid
- Open the style: from its name in the Products list, the Style filter (then Colour × size grid), or Settings → Styles.
- Each cell is one product with what you can sell now — in this branch or All branches, and what is coming. — means that combination is not made.
- More than two things differ? Choose what the Rows and Columns show.
Add colours or sizes
- On the style press Add colours / sizes (Owner or Admin).
- Choose what to combine — usually Colour × Size — and tick or type the values, e.g. add 1200×1200.
- Every missing combination becomes a new product. It copies the unit, box size, prices and the other values of the most similar product (the same size first). Change the SKU, name or price, or untick a row.
- Press Make … products. Then check the box size of any new size, and receive stock as usual.
Sell, report and connect by style
- On a quote, pro forma, invoice or purchase order, type the style’s name in Add an item, press the style, and click the colour and size on the grid.
- In Sales reports and Stock valuation, group by Style, Colour, Size or any attribute.
- Online shop: Fetch products links a variation without a matching SKU when the shop product’s name contains the style and its options (Colour Grey, Size 600×600) match exactly one product. They show by style — check them once.
Without lots: a simple shop
Not every business keeps lots, batches or shades. A jeweller, a gift shop or a parts counter just needs products, quantities and proper invoices. Switch lots off and Lotwisely leaves the lot screens out — and every plan costs about 40% less. See Lotwisely without lots.
Switch lots off
- New company: when you set it up, answer No — just products and quantities to “Do you keep stock by lot, batch or shade?”. The menu starts short and pickups need no signature (both below).
- Already running: the Owner opens Settings → Lots & wording and presses Switch lots off. Products without stock history become simply Stocked. If some products already have stock in real lots, it says which ones and stays on.
- From then on no screen, document or report asks for or shows a lot or shade. A new invoice line starts at a quantity of 1.
A shorter menu
- Open Settings → Menu (Owner or Admin) and untick what your business doesn’t use — Quotes, Pro formas, Delivery calendar, PO calendar, the hubs, Supplier returns …
- Or press Simple shop menu (no quotes, pro formas or calendars), then Save. It changes the menu and Create new for everyone in the company.
Pickups at the counter
- Open Settings → Delivery → When a customer picks up and choose Nothing — handed over at the counter (or Just the name).
- Then Picked up asks for nothing more than one press of Confirm picked up. The name is optional, and + Add a signature or photo is there when you want proof.
The price without lots
- In Settings → Plan & billing the plans show the lower price while lots are off. Choose one as usual.
- Already paying the normal price when you switch lots off? Plan & billing offers the lower one — press Change.
- Switching lots on while paying the lower price moves the plan to the normal price first; the difference for the month is charged then.
Customers and suppliers
- Open Customers (or Suppliers) and press Add customer (or Add supplier).
- Enter the name and, if you have them, email, phone and address. The email is used when you email documents.
- Click a customer to open their page: what they owe, what is overdue, credit and deposits to use, and every document in one Activity list.
- From there press New quote, New pro forma, New invoice or Receive payment — the customer is filled in.
- Builders send goods to building sites: the Sites card on a customer’s page keeps them — a name (e.g. Bondi job), the address, the site contact and phone, and a note such as a gate code. Press + Add site; Stop using hides one you no longer need (old documents keep their address).
- Use account numbers for your customers? Type it in Account no. (up to 30 characters, each one different). It is printed on their quotes, pro formas and invoices, and you can find the customer by it. The customer import and the Excel export have it too (column account_no).
Moving from your old system
Bring your lists, stock and what is still owed across from a spreadsheet. Settings → Import & export takes CSV or Excel — and files exported from QuickBooks or Xero just as they are; every row is checked before anything is saved, and each import can be undone. Owners and Admins only.
Lists and stock
- Open Settings → Import & export and go in the order shown: Item categories, Suppliers, Customers, Products, Opening stock.
- For each one press Download template (or download your current list), fill it in in Excel and upload it. Coming from QuickBooks or Xero? Upload their export as it is — see the tip below.
- Fix any row marked as an error and upload again. When there are none, press Import.
What customers still owe you
- Choose your cut-over day — the day you stop using the old system.
- Choose Opening balances: one row per invoice not fully paid on that day, with its old number, date, due date and what is still owed. Or press + Opening balance on a customer’s page to add one.
- Credit a customer still has (money paid in advance) goes in as a minus amount, or press + Opening balance → You owe them (credit). It becomes a credit they can use on invoices, or that you pay back.
What you still owe suppliers
- Choose Open supplier bills: the supplier, their invoice number, date, due date and what you still owe. Or press + Opening balance on a supplier’s page.
- They show in We owe and under Bills. Pay them with Pay bills, like any bill.
Correcting one
- Before any money has moved on it, press Edit or Delete.
- After that, press Adjust amount and give the reason (it is kept). Set it to what has been paid to write off the rest.
Selling
Quotes, discounts, pro formas and invoices — and following each order through.
Quotes and invoices
Quotes
- Open Sales → Quotes and press New quote. Choose the customer — type part of the name, phone or email — and add lines.
- Print, download or Email the quote. A quote does not hold stock.
- When the customer says yes, press Turn into invoice — or Turn into pro forma when there is a deposit or a big project (see the next section).
Invoices
- Open Sales → Invoices and press New invoice (or turn a quote into one).
- Add lines: type part of the product name, SKU or barcode and pick it (Change picks another). Enter quantities in boxes, or the area needed — it is rounded up to whole boxes. Add the Needed by date.
- Press Issue invoice. From now on it counts as demand, and you can choose lots.
Discounts and changing prices
- One line: type a Disc % (or a price) when you add it, or press Change under the price of a line that is there.
- The whole document: press Discount… above the lines — Every line % (e.g. 5% off everything), or Make the total (type the round number the customer agreed, inc or ex GST). Freight and services are left out unless you tick them.
- The PDF shows each discounted line’s List price, Disc and the price the customer pays — so they know what every line cost.
- Over your discount limit (or under cost)? Press Ask for approval. An Owner or Admin sees it on Today and approves it on the document; then the quote can be sent or the invoice issued.
What did they pay last time? GP while you talk price
- Press the 🕘 next to a product on a line — or Sold before next to the price while you add one. You see what this customer paid before; press All customers for everyone. At the top: the last price to this customer, the last price to anyone, and your price list.
- Each sale shows the date, the invoice (click to open it), the lot, the quantity, the price after discount and the discount. Tick Also quotes and pro formas to see prices you offered too.
- Press Use to put that price on the line.
- Press GP above the lines to see each line’s GP % and $, and the whole document’s. Press it again to hide it — it is hidden every time the page opens, so the customer can look at your screen.
- Negotiating? Click a line’s GP and type the GP you want (e.g. 40) — the price is worked out for you: cost ÷ (1 − 40%), up to the next cent. Then Save price.
Repeat orders: copy lines from a past order
- On a quote, pro forma or invoice with the customer chosen, press Past orders above the lines. On the left: this customer’s earlier documents of the same kind, newest first — invoices on an invoice, pro formas on a pro forma, quotes on a quote. Tick Also show to add the other kinds. Search by number, reference or a product that was on it.
- Click one to see its lines on the right. Press Open to open that document.
- Untick the lines you don’t want and change quantities. Each line shows what is available to sell now — more than that is shown in orange.
- Choose the price: Today’s price (your price list, or the trade price for trade customers) or Same price as last time. Lotwisely remembers your choice.
- Press Copy lines. The lines are added to the document you are writing.
- From an earlier invoice, quote or pro forma, Repeat this order makes a new draft for the same customer with Past orders already open on it.
Internal notes and alerts nobody can miss
- Every quote, pro forma, invoice and customer has an Internal notes card. Write a note and press Add note — it keeps who wrote it and when. The customer never sees it: not on the PDF, the email or the portal.
- For something nobody may miss — “price in dispute, don’t deliver yet”, “call 30 minutes before delivering” — tick Pop up as an alert before you add it.
- Choose who it pops up for: Office (Owners, Admins, Sales and Viewers) or Everyone (warehouse staff too — they see it on the delivery and the Packing screen).
- Whoever opens that document, a document linked to it, its delivery, or anything for that customer (the customer page, or picking them in POS) gets a pop-up they must close with I’ve read it. Lotwisely keeps who read it and when.
- After that a red line stays at the top of the screen. Click it to read the alert again.
- When it is sorted, press Mark resolved under the alert in Internal notes. The pop-up and the red line go away. Reopen brings it back, and everyone has to read it again.
Ship to a site, and the customer’s PO number
- On a quote, pro forma or invoice, the Ship to line sits next to Internal notes. It says Same as Bill to until you press + Different address.
- Pick one of the customer’s saved sites, or choose A new address… and type the address, the site contact and phone. Tick Keep this address as a site of the customer to use it again next time.
- Press Save Ship to. Same as Bill to takes it off again.
- The customer sent their own order number? Type it in Customer PO at the top of the pro forma or invoice and press Save.
Must be shade: the same shade as before
A customer comes back for more of what they bought — and it has to match. Put Must be shade on the line, and Lotwisely makes sure no other shade is reserved, ordered or sent for it.
- On the quote, pro forma or invoice, press + Must be shade… under the product. Type the shade (e.g. 01K) — or the lot number — and press Save.
- In Order & track → Choose lot, lots of that shade come first. Any other shade shows Not shade 01K and can’t be used. On a pro forma, the same goes for holding a lot.
- No free stock of that shade? Order it in Order & track: the purchase order line says MUST BE SHADE 01K — on the PDF and in the email — and is never merged with a line for another shade.
- When the goods arrive, Receive goods shows the shade on that line and warns you if the boxes you type are a different shade.
Pro formas and deposits
A pro forma comes between the quote and the invoice: to take a deposit before ordering in, or for a big project that is invoiced bit by bit. It is not a sale and not a tax invoice.
Issue it — the stock is held
- Press Turn into pro forma on a quote, or Sales → Pro formas → New pro forma.
- Check the lines and press Issue pro forma. From now on what is on it is held for the customer: it comes off Available to sell.
- To keep a particular lot or shade, press Hold a lot under Stock held and choose one. It goes with the line when it is invoiced.
Take the deposit
- Press Receive deposit. The payment screen opens with the pro forma under Deposits on pro formas.
- Enter the amount, method and reference, and press Save payment. One payment can cover invoices and pro formas together.
Invoice it — all at once, or part by part
- All of it: press Convert to invoice and confirm. One issued tax invoice is made for everything, dated today, with the deposit taken off. Later it says Invoice the rest.
- Only part of it: press Invoice part… — for each line, enter how many boxes to invoice now — All or None for quick choices.
- Choose the invoice date and how much of the deposit to take off (the most that fits is filled in), then press Create invoice. The invoice opens; the rest stays on the pro forma, still held.
- When everything is invoiced, the pro forma closes by itself. If the rest is no longer wanted, press Close the rest.
Selling check
Use it when a customer wants more than is available today.
- Open Inventory → Selling check, choose the product, and enter how much and when it is needed.
- Read the answer at the top: In stock, Can be sold against incoming stock, or Not enough before an earlier order is due.
- The list shows each day: stock, arrivals by ETA, and orders and pro formas by their needed-by date, with the projected stock after each.
Order & track: from order to delivery on one screen
Every issued invoice and pro forma has an Order & track section. Each line shows, column by column, where it stands — so you never have to look on another screen.
Read a line
- Ordered: in stock, or the purchase order it waits for with the supplier and ETA. In red: how much still has to be ordered.
- Received: the day it arrived, the supplier’s invoice number and the lot.
- Reserved: the lot reserved for this line, or Choose lot.
- Delivery, Packed and Gone: the delivery or pickup, whether the warehouse has packed it, and when it left.
- Click any PO, receipt or delivery number — it opens in a window over the invoice. Close it and you are back.
Order what is missing
- Press Order missing items. Every line that is short is listed with its main supplier and the quantity needed.
- Untick what you don’t want, change the supplier or the quantity (Pallet · Box · Piece), and press Order.
- Each supplier gets one purchase order: the items go on their open draft PO in this branch, or on a new one. The line now shows that PO.
- Open the PO from the line to Mark as sent or Email it to the supplier.
When the goods arrive
- Press Receive in the Received column (warehouse staff, Owners and Admins). A window opens over the invoice with what is still to come on that PO — this line ticked first, other lines on the same PO unticked.
- Type the lot, the shade and where it goes, and check the quantity. Two lots in one delivery? Press + another lot. Add the supplier’s invoice number if you have it.
- Leave Reserve what comes in for this invoice ticked and press Receive & reserve. The stock goes in, the PO and the bill are updated (with the PO costs) and the lot is reserved for this line — all in one go.
- Received on the Receive goods screen instead? The line shows Received with the lot and Choose lot in Reserved — press it; the lot that arrived for this order is suggested first.
- Schedule the delivery or pickup under Deliveries & pickups. Packing and dispatch show on the line as the warehouse works.
From another branch
- Not enough here, but another branch has it? Press Ask another branch (or Ask a branch on one line). You see how much each branch can sell; choose the branch and the quantities and press Ask.
- The request shows in the Ordered column (e.g. SYD-TRF-1006 · asked) and that quantity is no longer counted as still to order.
- Once the other branch has sent it, press Reserve on the line — the lot is reserved for this customer while it is still on the road. The line shows Reserved — on its way.
- When the receiving branch puts it on a shelf, the line moves to Ready to schedule: reserve now, deliver after it arrives.
Holding requests: ask a supplier to keep goods aside
A holding request is not an order. It asks the supplier to keep the goods aside for a few days while your customer decides. When the customer says yes, it becomes a purchase order in one click.
- Issue the invoice or pro forma. In Order & track, press Ask to hold at the top (every line still to order) or Ask to hold on one line.
- Tick the lines, check the supplier and the quantity (Pallet · Box · Piece), choose Please hold until (a week from today unless you change it) and add a note for the supplier if you like. Press Make holding request.
- One request is made for each supplier, numbered like SYD-HLD-1001. Press Email to send it as a PDF, or PDF to print it.
- The line shows the request in the Ordered column: the supplier, the hold-until date, and whether it was emailed.
- The customer said yes? Click the request and press Order now — the lines go on that supplier’s purchase order. Not needed? Press Release — not needed.
Back orders
- When no lot fits, press Wait for a purchase order under the line and choose the PO it should come from.
- See all waiting orders in Sales → Invoices → Back orders. When the PO is received they move to Ready to allocate.
- Open the invoice and choose the lot — the one from that delivery is suggested first.
Trade accounts
Trade customers buy on account: a set discount, payment terms and a limit on what they may owe. Only an Owner or Admin sets these.
Set up a trade account
- Open the customer. Under Trade account, sales press Request trade account and say why (business name, ABN, how they buy). It shows on the Owner’s Today screen.
- An Owner or Admin opens the customer and presses Approve… (or Set up trade account): the Trade discount %, the Limit (what they may owe; empty = no limit) and the Payment terms — days after the invoice, or days after the end of the month (EOM). Press Approve trade account.
- Later: Change terms, Put on hold… (no new invoices), Take off hold or End trade account.
Selling to a trade customer
- Add lines as usual: the price comes in at the trade price, with the list price beside it. You can still change it.
- The Payment due date follows their terms (e.g. 30 days EOM).
- Above the invoice a line shows their account: discount, terms, what they owe of their limit, and anything overdue.
When an invoice is stopped
- Pressing Issue invoice is stopped when the account is on hold, an invoice is overdue, or this invoice would take them over their limit. A window shows why, with the numbers.
- Best: take a payment first (Receive a payment). Or type why it should go ahead and press Ask for approval.
- The Owner or Admin sees it on Today and on the invoice, and presses Approve or Decline (with a reason). Once approved, issue the invoice.
- Making an invoice from a pro forma works the same way.
Customer groups: compare sales by kind of customer
Put each customer in a group — Trade, Home and Online to start with, or your own words — and compare the sales and GP of each group in the sales reports. A group is only a label for reports: it gives no price, discount or terms (that is a trade account).
Set up your groups
- Open Settings → Customer groups. Every company starts with Trade, Home and Online.
- Click a group to rename it or change its colour, Add group for a new one (e.g. Project), ↑ ↓ to change the order, or Remove. A removed group that is already on invoices keeps its name in old reports.
- Under Groups chosen for you: the group for New customers, for Walk-in sales at the till, and for Online shop orders (WooCommerce, Shopify).
Put customers in a group
- One customer: open it, Edit details, choose the Group.
- Many at once: on Customers, tick them (or Select all N in this list after a search or filter), then choose the group next to Put them in. No group takes them out.
- From a spreadsheet: Settings → Import → Customers has a group column (the group’s name; none takes a customer out of its group).
- Find a group’s customers with the filter at the top of the Customers list.
Sales by group
- Open Reports → Sales reports and choose Group by: Customer group — sales, GP and GP % of each group. Click a group to see its invoices.
- Or keep any other grouping and pick one group in the filter next to the search (e.g. products sold to Trade only).
Trade portal: trade customers order online
Your trade customers sign in at portal.lotwisely.com/yourstore, see their own prices and your stock, and send order and quote requests. Your team turns each request into a quote, pro forma or invoice. The Trade portal add-on, on Plus and Multi-site, per 25 trade customers.
Open the portal
- Owner: add Trade portal in Settings → Plan & billing (25 trade customers, then 25 more at a time). During the free trial you can try it without.
- Open Settings → Trade portal. Choose the Portal address (e.g. harbourside → portal.lotwisely.com/harbourside) and tick Portal is open.
- Choose Stock from (the branch whose stock they see and whose Sales get the requests), whether Anyone can apply, whether to Show stock numbers, the Products on the portal (categories) and a welcome line.
- Send new requests to: the email addresses that hear about new requests and applications (blank = the company email).
- Press Save. The address is shown at the top — open it to see what your customers see.
Let a trade customer in
- The customer needs an approved trade account (see Trade accounts above).
- On the customer’s page, under Trade portal, type their email, choose Admin (they can invite their own team) or Staff, and press Invite to the portal. They get an email with a join link (it works for 14 days).
- Or they apply on the portal themselves. The application shows under Sales → Portal requests → Applications: press Decide…, link it to an existing customer or make a new one, set the terms and Approve — or decline with a reason. They get an email either way.
Requests from the portal
- A new request shows in Sales → Portal requests (with a count in the menu) and by email.
- Open it: the lines with the price they saw and today’s price, the ship-to, their PO, the date they need it and any files.
- Press Make quote, Make pro forma or Make invoice — a draft with everything filled in opens. Check it and send or issue it as usual.
- Or write a Reply (they see it on the portal and by email), or Decline with a reason.
Counter and online shop
The till at the counter, and WooCommerce or Shopify orders.
Point of sale (counter sales)
For customers who buy and take the goods straight away. Open Sales → Point of sale. Only stock on the shelf can be sold — nothing is ordered or held. Underneath, each sale is a paid invoice with a pickup — sent to Packing, or handed over at the counter — so stock, reports and your accounting software follow by themselves.
Open and close the till (shifts)
- Give the till a name for this computer (e.g. Till 1), count the float in the drawer and press Open the till. Type the amount, or press Count notes and coins and type how many of each — the total adds up for you.
- During the shift, cash taken out of the drawer or put in (milk and coffee, a courier, more change) goes in Paid in / out, with what it was for.
- At the end press Close till and count the drawer the same way — the amount or notes and coins. Under Other payments you can also type what the EFTPOS settlement slip says for each method.
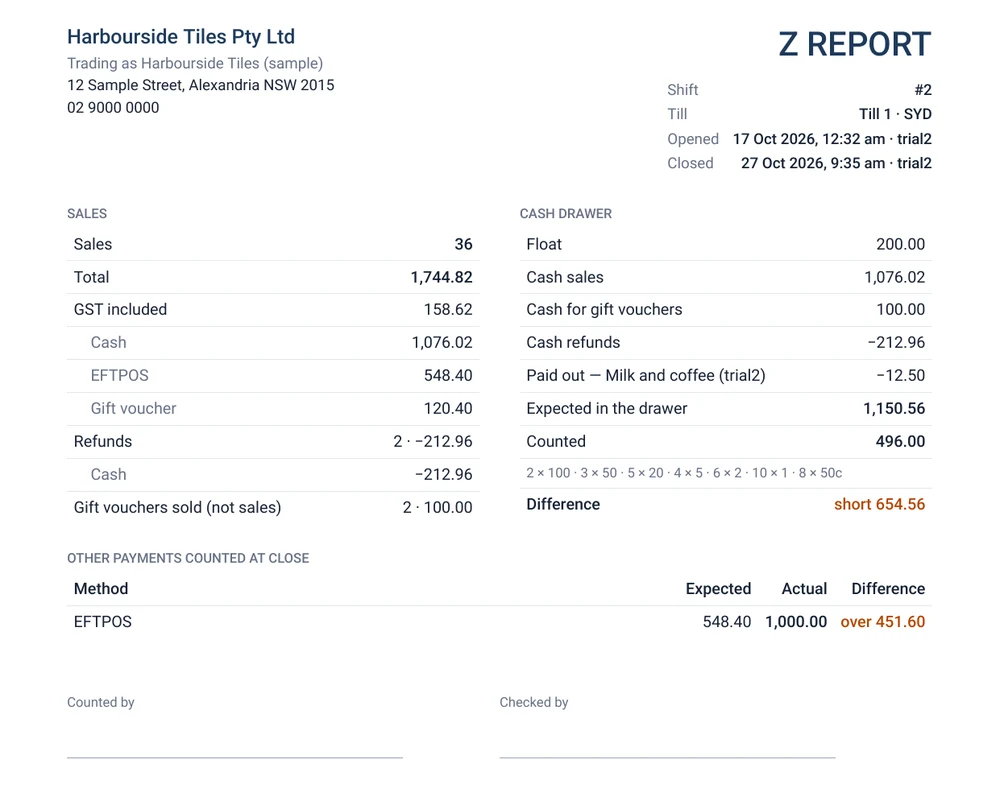
- The report shows sales by method, refunds, paid in and out, the cash expected in the drawer, what was counted and whether it is over or short — for cash and for each other method. It prints as a Z report on the docket printer, or press A4 report for a PDF to print, download or share.
- Shifts at the top of the till lists every shift: opened and closed, by whom, sales, expected and counted cash, over or short. Open one to see its report and print the Z report or A4 report again. A shift still open gives an X report — the figures so far.
Sell
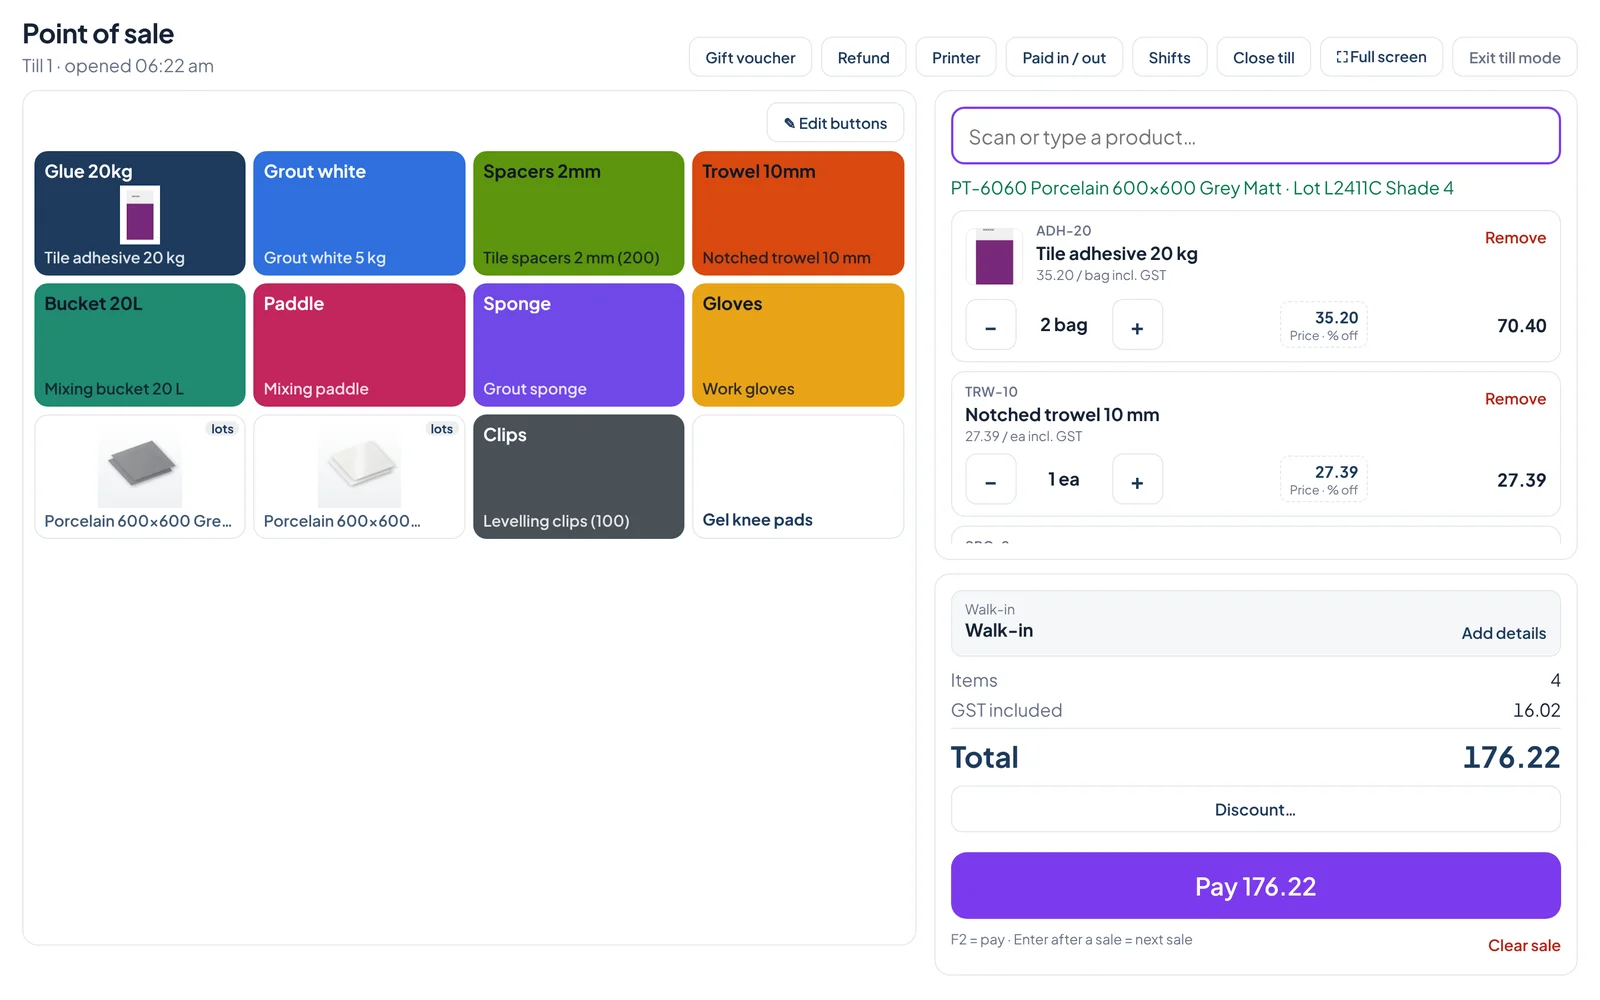
- Scan the box barcode or the shelf label, or type part of the name or SKU. Scanning the same product again adds a box.
- If the product is on the shelf in more than one lot, choose the one the customer takes — or scan the shelf label and the lot and shelf are set for you.
- Leave the customer as Walk-in, or press it to type their name, phone, email and address (printed on the docket and the tax invoice, no customer record), or search a registered customer.
- Use + and − for whole boxes. Press the price on a line to change it or give % off (see Discounts and price changes below).
Take the money
- Press Pay (or F2). Click a payment method to put the balance on it, or type an amount — amounts on two methods split the payment.
- FULL PAYMENT puts the whole balance on the chosen method. The notes 5 · 10 · 20 · 50 · 100 add up on Cash, and the change shows in big numbers.
- Choose what happens to the goods: Send to Packing (the warehouse packs it and the customer signs when they collect) or Customer takes it now (handed over at the counter — done).
- Lotwisely always asks Take this payment now? before the money is taken. Press Yes — the docket prints and the drawer opens.
- After the sale: print the docket again, open the A4 tax invoice, or press Enter for the next sale.
The docket printer
- Press Printer on the till. Each computer (each till) has its own setting, and Lotwisely keeps a copy for each till — clear the browser and choose the same till under Which till is this computer?, and the printer settings come back.
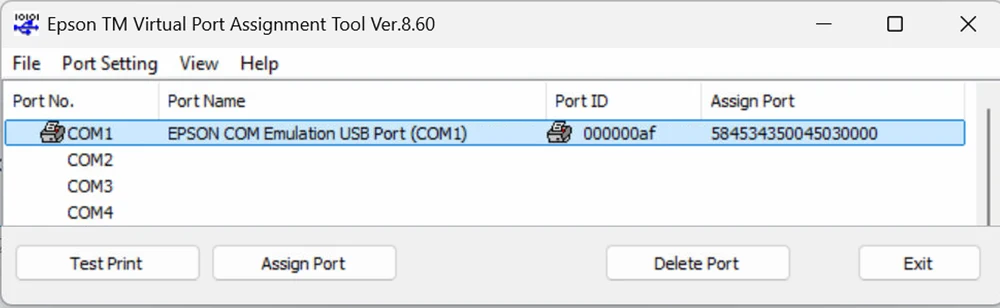
- Epson printer on USB (recommended on a Mac, Chrome or Edge — not on Windows, see below): press Connect USB printer and choose the printer — no driver needed, Apple-silicon Macs too. If the printer was added in the Mac’s Printers & Scanners, remove it there first and plug the cable in again. Press Test print and Test drawer.
- Epson printer on the network — when several tills share one printer, or on Safari or an iPad (TM-T82IV, TM-T88, TM-m30 …): type its IP address. The first time, open https://<printer IP> in the same browser and accept the printer’s certificate; allow local network access if Chrome asks. Press Test print and Test drawer.
- This computer’s print: any receipt printer installed on the Mac or PC. The print window shows each time; set the drawer to open in the printer driver.
- No docket printer: this till prints nothing and the cash drawer never opens; the Print docket button goes away. Use A4 tax invoice or Email invoice after the sale.
- Choose 80 mm or 58 mm paper, whether to print after every sale and open the drawer for cash. Owners and Admins can add a docket footer (e.g. returns policy) and, to save paper, leave the QR code off the docket in Settings → Point of sale — a TO COLLECT docket always keeps it, because it is scanned at pickup.
Refund at the till
- Press Refund on the till and find the sale: type the docket or invoice number, the name or the phone — or pick it from today’s list.
- Choose what comes back with − / + (or Everything), and mark each line Good or Faulty. Good goods go back on the sale shelf in the same lot; faulty goods go to the not-for-sale shelf.
- The money goes back the way it came in (cash, EFTPOS …) — change it if the customer wants it another way. Cards give back at most what was paid on them.
- Press Refund, then Yes, refund. The refund docket prints and the drawer opens for cash. A credit note is made and approved for you, and the till report counts the refund.
When the customer collects later
- A sale sent to Packing prints TO COLLECT on the docket, with the pickup number and a QR code. The done screen shows the pickup and Open in Packing.
- The warehouse sees it in Packing for today and packs it like any other pickup.
- When the customer comes back with the docket, press the scan button on Packing and scan its QR code — the pickup opens. Press Picked up: name, signature and a photo, then Confirm picked up.
Discounts and price changes
- Each line starts at the customer’s price — the list price, or the trade price for a trade customer.
- Press the price on a line (it says Price · % off). Type a new price each (incl. tax) or a % off — the other one follows. The line then shows the old price struck through and “15% off”.
- A discount on the whole sale: press Discount… under the lines. Give every line % off, or make the total a round number — Lotwisely spreads it over the lines to the cent. Remove all discounts puts every price back.
- The totals show a Discount line. The docket prints “was 35.20 · 15% off” under the line and You saved under the total.
Touch buttons (tablet or touch screen)
- Turn them on once: Settings → Point of sale → Touch buttons, tick Use touch buttons at the till and press Save (Owner or Admin). While it is off, the till stays as it is.
- Each till chooses for itself under On this device, on the same settings page: show the buttons on this computer or tablet or not, and on the Left or Right of the sale. Open the page on that till to set it — it is saved straight away. A counter computer with a scanner can keep the plain till.
- Set the buttons at the till: press ✎ Edit buttons, tap a place and pick the product. Give it a short name if you like (up to 24 letters), a colour, and choose whether its photo shows. Press Save.
- There are 24 places (4 across, 6 down) for each branch — the same on every till in that branch. Move… puts a button in another place (the two swap), Empty this place takes it off. Press Done when finished.
- To sell, tap the button. It works like a scan: the same stock rules, and a product in more than one lot asks which lot the customer takes. Scanning and typing still work beside the buttons.
Gift vouchers
Sell gift vouchers at the till (or on the Gift vouchers screen for phone orders). They work at every branch, can be used a bit at a time, and the balance stays on the same number. Every plan.
Sell one
- On the till press Gift voucher (top right). On a computer in the office: Sales → Gift vouchers → Sell gift voucher.
- Choose the amount — $25, $50, $100, $200 or type any amount.
- Type For (who gets it) and From (the buyer), a message if they like, and the buyer’s email.
- Choose how it is paid; for cash type the cash given and the change shows.
- Press Take … — sell voucher. The gift docket prints with the amount, the message, the number and a QR code, and the date it is valid until.
- Press Email to … to send the buyer the voucher as a PDF to print or forward. PDF to print gives an A5 card.
Use one
- Scan the products and press Pay.
- Press + Gift voucher, then scan the QR or type the number and press Check — the balance shows.
- The voucher pays as much as it can; put the rest on cash or card as usual.
- The docket shows what is left on the voucher.
- In the office: Receive payment, choose the method Gift voucher and type the number.
Keep track
- Sales → Gift vouchers lists every voucher: for whom, from whom, the amount, what is left and until when — and the total still owed to voucher holders.
- Type a number in Check a voucher number to open it. Each voucher shows its whole history: sold, used on which invoice, refunds.
- Reprint the gift docket, send the email again or change the names.
- Owners and Admins can change the balance or give more time (with a reason), or cancel a voucher and give the money back.
If you use Xero or QuickBooks
- In Xero or QuickBooks, make a liability account such as Gift vouchers and allow payments to it (in Xero: tick Enable payments to this account).
- In Lotwisely open Settings → Accounting and press Read accounts again so the new account shows. Under Payment methods you now see Gift voucher — choose that account and press Save.
- From then on, an invoice paid with a gift voucher is paid from that account — not your bank — so the bank feed still matches.
- The money taken when a voucher is sold is not sent across yet: record it into the same account (the cash summary shows it on its own line).
Self-service kiosk
A tablet in the shop where customers find products, fill a basket and print their order. The till scans the docket and takes the payment. The Kiosk add-on, per kiosk.
Set up a kiosk
- Owner: add the Kiosk add-on in Settings → Plan & billing (one per screen). During the free trial you can try it without.
- Open Settings → Kiosks and press Add a kiosk — give it a name (e.g. Front door) and the branch.
- Press Open on the tablet to see the kiosk’s link and QR code. Then follow the steps for your screen below: iPad, Android or Windows.
- The first device that opens the link keeps it — another device is refused. So open it only on the screen that will be the kiosk.
- The docket printer: on the kiosk, hold the shop’s name at the top for 3 seconds, type an Owner or Admin PIN (the till PIN), choose the printer and press Test print. No printer? The kiosk shows the number and QR on screen.
On an iPad
- Scan the QR with the iPad’s camera, or type the link in Safari.
- The kiosk shows Set up the kiosk: press Share (the square with the arrow) → Add to Home Screen → Add.
- Close Safari and open the new icon on the Home Screen. The kiosk opens full screen, without Safari’s bars — this icon is the kiosk from now on.
- Lock the iPad to it: Settings → Accessibility → Guided Access → on, and set a passcode. Open the kiosk and triple-click the top (or Home) button → Start. Triple-click and the passcode end it.
- Printer: an Epson receipt printer on the same Wi-Fi (TM-m30, TM-T82 …) — choose Epson printer on the network and type its IP address.
On an Android tablet
- Open the link in Chrome.
- Press ⋮ → Add to Home screen (or Install app), then open the kiosk from that icon. It also goes full screen at the first touch.
- Lock the tablet to it: Settings → Security → App pinning (some tablets: Pin windows) → on. Open the kiosk, press the Overview button (the square) → the app’s icon → Pin.
- Printer: an Epson receipt printer on the network — choose Epson printer on the network. A USB printer also works with Chrome: choose Epson printer on USB and press Connect.
On a Windows touch screen
- Right-click the desktop → New → Shortcut.
- Paste this as one line, with your kiosk’s link:
"C:\Program Files\Google\Chrome\Application\chrome.exe" --kiosk "https://app.lotwisely.com/kiosk/…" --kiosk-printing— name it Kiosk and press Finish. - Open the kiosk only with this shortcut. It fills the screen with no address bar, tabs or close button; customers can’t leave it. Staff close it with Alt + F4.
- To start it when the PC starts: press Win + R, type
shell:startup, and copy the shortcut into the folder that opens. - Printer: set the receipt printer as the Windows default printer, and in the kiosk’s settings choose The tablet’s print — with
--kiosk-printingdockets print straight away, without a print window. An Epson printer on the network works too.
What the kiosk shows
- In Settings → Kiosks → What the kiosks show, tick the categories to show (none ticked = all). They become the big tabs at the top.
- Products without lots in those categories show by themselves. “Not stocked” products (freight, services) never do.
- Each product has a Kiosk choice on its page: Automatic, Always show or Never show. Products with lots only show when set to Always show — the customer chooses the boxes and the shade is chosen at the counter.
- Give the main product photo in Products — the kiosk uses it. Choose whether to show how many are in stock, how soon it starts again for the next customer, a welcome line and words for the bottom of the docket.
At the counter
- The customer brings the docket with the order number (e.g. K-012) and QR code.
- On the till, scan the QR — or type K-012 in the scan box, or press Kiosk orders and Add to sale.
- The lines come into the sale. For a product with lots the till asks Which lot? with the lot photos. Change anything you need, then press Pay as usual.
- When it is paid, the kiosk order shows as Paid. An order nobody came for can be cancelled in Kiosk orders — nothing was reserved or invoiced.
Online shops (WooCommerce, Shopify)
New to this? The step-by-step page explains every click, the words you’ll see and what to do if something goes wrong. Connect your WooCommerce or Shopify shop: paid online orders come in as paid invoices, and the shop shows how many boxes you can sell. Owners and Admins set it up under Settings → Online shops.
Connect a WooCommerce shop
- In WordPress: WooCommerce → Settings → Advanced → REST API → Add key, permission Read/Write. Keep the page open.
- In Lotwisely: Settings → Online shops → Connect a shop. Type the shop address, choose the branch that takes online orders (the invoice is made there and the goods leave from there), which branches’ stock is offered (all, added up, or the ones you pick), the product used for shipping (a non-stock product, e.g. FREIGHT) and how many boxes to keep back. Press Connect.
- Open the shop, paste the Consumer key and Consumer secret and press Save keys. They are never shown again.
- Press the buttons in order: 1. Test connection, 2. Fetch products, 3. Receive orders, 4. Send stock now.
Connect a Shopify shop
- In Shopify admin: Settings → Apps → Develop apps, then open the Dev Dashboard and create an app (in the same organisation as your store).
- Give the app the access read_products, read_inventory, write_inventory, read_locations, read_orders, read_merchant_managed_fulfillment_orders and write_merchant_managed_fulfillment_orders, plus protected customer data (name, email, phone, address). Release the version and install the app on your store.
- In Lotwisely: Settings → Online shops → Connect a shop, choose Shopify and type the store’s myshopify.com address (e.g. https://your-shop.myshopify.com), even if customers use your own domain. Choose the branches, the shipping product and the boxes to keep back, then Connect.
- Open the shop, paste the app’s Client ID and Client secret and press Save keys. Then 1. Test connection (it shows the Shopify location whose stock Lotwisely sets), 2. Fetch products, 3. Receive orders, 4. Send stock now.
Link the products
- After Fetch products, shop products with the same SKU as yours are linked by themselves. Link the others by typing your SKU or name in the yellow rows.
- 1 shop unit = is one box of your product (e.g. 1.44 m²). Change it if the shop sells something else, such as a single m² or a pallet.
- For products with lots, choose One lot to offer only what a single lot can supply (no mixed shades), or All lots.
When an order comes in
- A paid order (WooCommerce Processing or Completed) becomes a paid invoice in the order branch, marked WooCommerce #number. The customer is found by email, or added.
- Reserve the lots, schedule the delivery or pickup and pack it as usual. The ship-to address is copied into the delivery.
- When the delivery is Dispatched (or picked up), the shop is told: Shopify marks what went as fulfilled with the carrier, con note and tracking link; WooCommerce gets a note to the customer and the order is completed once everything has gone. The customer gets the shop’s usual email. Put each carrier’s tracking link under Settings → Delivery (e.g. https://carrier.example/track?con={con_note}).
- Orders not paid yet wait as Not paid yet and come in once they are paid.
- An order that can’t be invoiced (a product not linked, shipping without a shipping product) shows Needs you with the reason. Fix it and press Try again.
Stock and lots
What you have, lot by lot and shelf by shelf, and moving or counting it.
Stock and available to sell
The Stock screen answers one question first — how much can I still sell? The other numbers show where the rest of the stock has gone.
Find a product
- Open Stock. Each product is one row; type part of the SKU, name or colour to find it.
- Click a product to see every lot and shade in every branch, with what is free in each.
- Click Stock by date, arrivals and orders to open the Selling check for that product.
What each number means
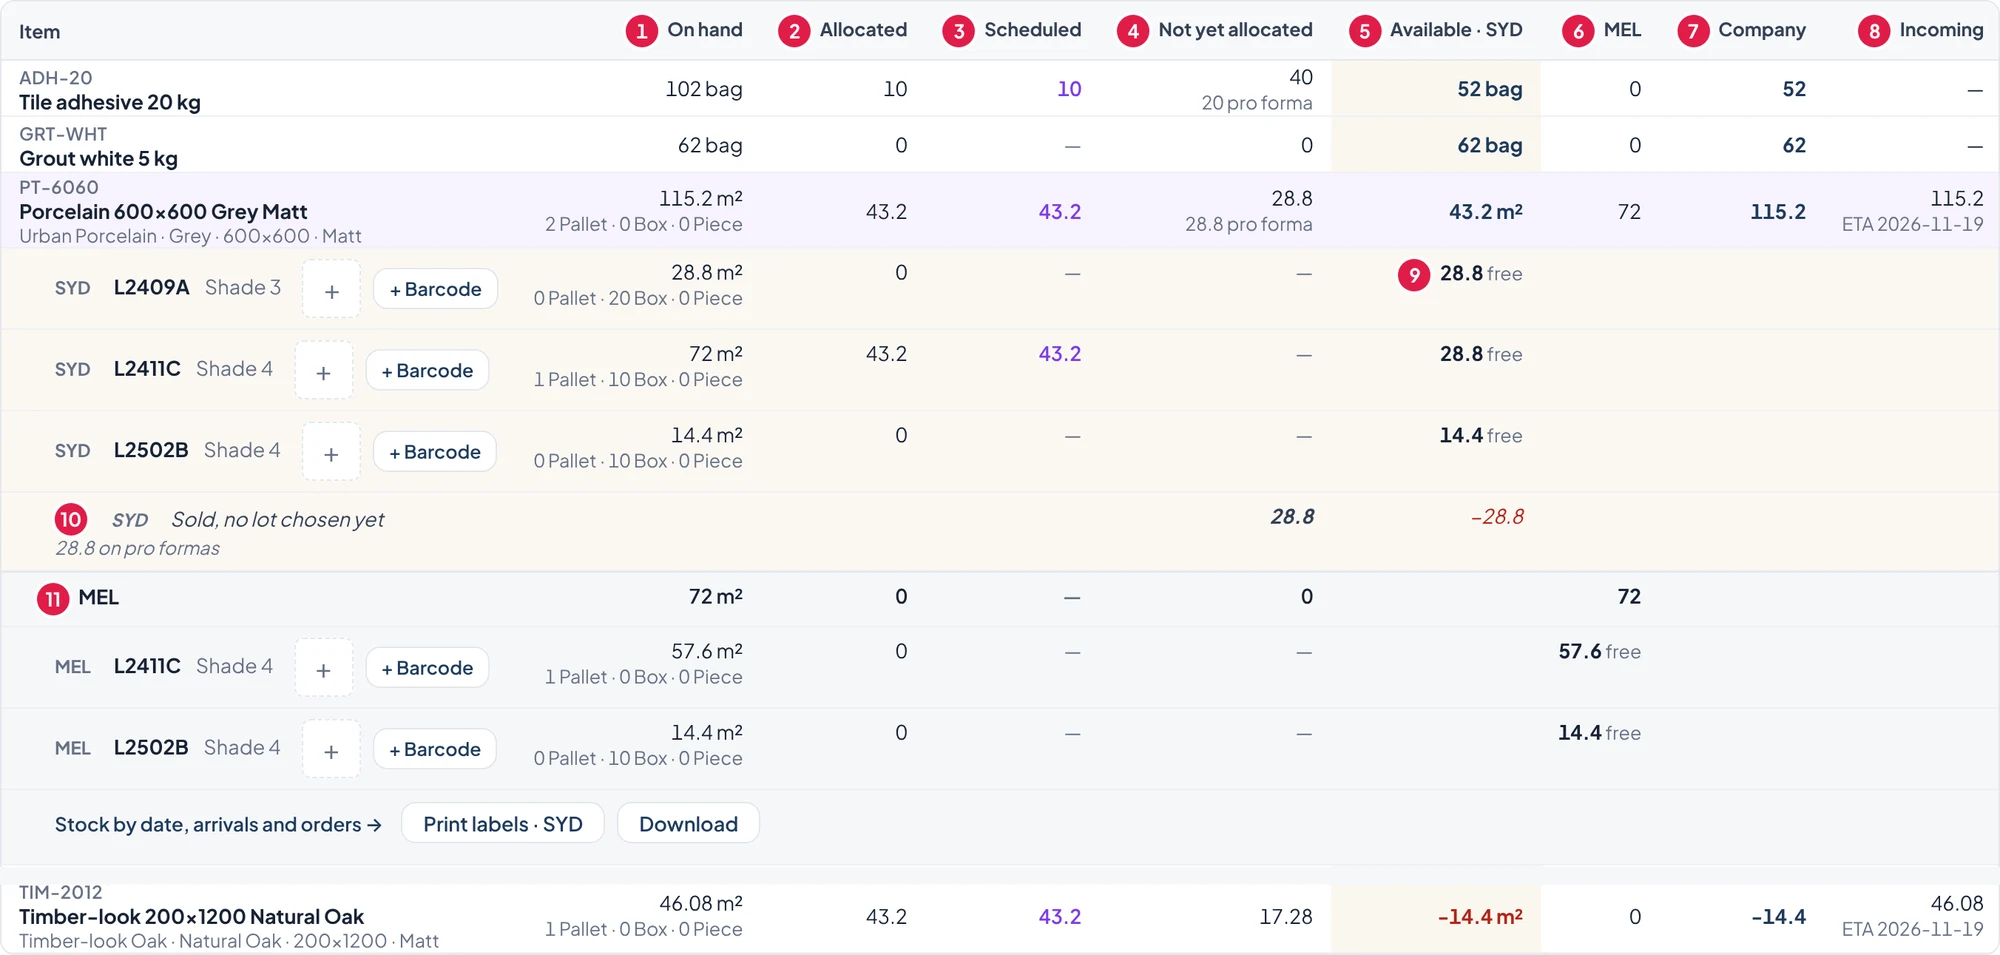
- On hand — everything on the shelves in your branch, in the product’s unit (m², bag …) and under it in Pallet · Box · Piece. Porcelain 600×600 Grey Matt: 115.2 m² = 2 pallets.
- Allocated — stock already given to a sale: a lot was chosen on an invoice line. It is still on the shelf, but it belongs to that customer. Here: 43.2 m².
- Scheduled (purple) — the part of Allocated that is already in a delivery or pickup, waiting to be packed or to leave. It is not extra: it is inside Allocated.
- Not yet allocated — sold on an issued invoice or pro forma, but no lot chosen yet. The small “pro forma” under it is how much of it issued pro formas hold. Here: 28.8 m², all on a pro forma.
- Available · SYD (shaded) — what your branch can still sell: On hand − Allocated − Not yet allocated. 115.2 − 43.2 − 28.8 = 43.2 m². Red and below zero means more is sold than you have — look at Incoming.
- MEL — the same Available for each other branch, one column each. Need it here? Make a branch transfer.
- Company — Available in all branches together: 43.2 (SYD) + 72 (MEL) = 115.2 m².
- Incoming — on purchase orders that are sent or partly received, and branch transfers on the way, with the next ETA.
- Open a product: its lots are listed under it, each number under its own column. A lot’s free (on hand − allocated) sits in its branch’s column — Sydney’s under Available · SYD, Melbourne’s under MEL.
- Sold, no lot chosen yet — what is sold without a lot (the same number as Not yet allocated). It belongs to no lot, so it is taken off the branch’s column: 28.8 + 28.8 + 14.4 − 28.8 = 43.2 = Available · SYD. Every column adds up to the product’s row.
- Each other branch has a line with its own totals (MEL: 72 m² on hand, 72 available), then its lots and, if any, its own Sold, no lot chosen yet.
Choosing lots
- Open an issued invoice. In Order & track, press Choose lot in the Reserved column of a line.
- The best lot is marked Suggested — one that covers the whole line, the lot the customer had before, or the one that arrived for this order.
- Press Use … to reserve it.
Stocktake
Start a stocktake
- Open Inventory → Stocktake and press New stocktake.
- Give it a name if you like, and choose the Shelves and Categories to count. Leave both empty to count the whole branch.
- Press Start counting. Selling, deliveries and receiving go on as usual.
Count (on the phone)
- Open the stocktake and press Count. Choose the Shelf.
- Find the product by name, SKU or barcode — or press Scan and scan the shelf label: product, lot and shelf are filled in.
- Pick the lot. Lots on this shelf come first, marked On this shelf. Found one that isn’t in the system? Press + New lot and type its number and shade.
- Type Pallet · Box · Piece — the quantity is worked out — and press Save count. Products without lots need just the quantity.
- If someone already counted that lot on that shelf, choose Replace it or Add to it.
- When everything is counted, press Finish counting.
Review and approve (Owner or Admin)
- Open the stocktake on a computer. Each line shows the system quantity when it was counted, the difference in m² and boxes, and its value.
- Press Count again on a line to send it back to the counters. Less than reserved warns that an order may be short.
- Under Not counted, tick the lots that are really gone — they are set to 0. Unticked ones stay as they are.
- Press Approve… — one stock adjustment changes every difference, and it is in the stock history.
Branch transfers
Move stock from one branch to another as a document, so everyone knows where it is — at the sending branch, on the road or on the receiving branch’s shelf. The same lot moves, so shades never get mixed up.
Ask for stock, or send it
- Open Inventory → Branch transfers (shown when you have more than one branch).
- The branch that needs it presses Request stock: choose the branch to ask, the products and how much (a particular lot if it matters), an ETA and a note. It shows as Requested at both branches.
- The sending branch opens the request and presses Prepare to send. Pick each asked-for line — the lot and shelf with enough stock is chosen for you — check the quantity and press Save — ready to send. That stock is now reserved there: it can’t be sold or sent elsewhere.
- No request needed? The sending branch can press Send to a branch and start straight away.
On its way
- When the truck leaves, press Send — on its way (Warehouse at the sending branch). The stock leaves the sending branch and shows as in transit at the receiving one: counted in stock value, but nobody can sell or deliver it.
- For a branch around the corner, tick Arrives at once: it is sent and put away in one step (you choose the shelves). You need Warehouse rights in both branches.
- Print transfer slip for the driver: lots, shelves and quantities, with a QR code that opens the transfer.
When it arrives
- The receiving branch opens the transfer (or scans the slip on the phone), checks how much arrived and chooses the shelf for each line, then presses Receive.
- Less than was sent? Receive what came. The rest stays as a Difference for an Owner or Admin: Found (it goes onto a shelf), Back to sender (back where it came from) or Write off (with a reason).
Stock moves and adjustments
Move stock
- Open Inventory → Stock moves → Move, choose from and to (another rack in the same branch), the product, lot and quantity, and post.
Damage and quick corrections
- Open Stock moves → Adjust, choose the reason (damaged, found…), add the products and the difference, and save. To count shelves, use Stocktake.
- An Owner or Admin sees it under Waiting for approval and presses Approve (or Discard).
History
- Stock moves → History lists every receipt, delivery, move, return and adjustment. Filter by product.
Barcode labels for products
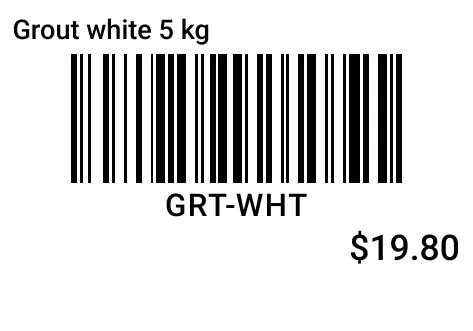
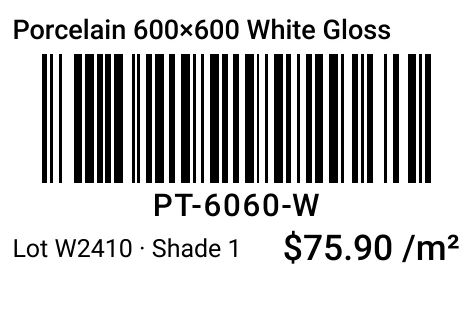
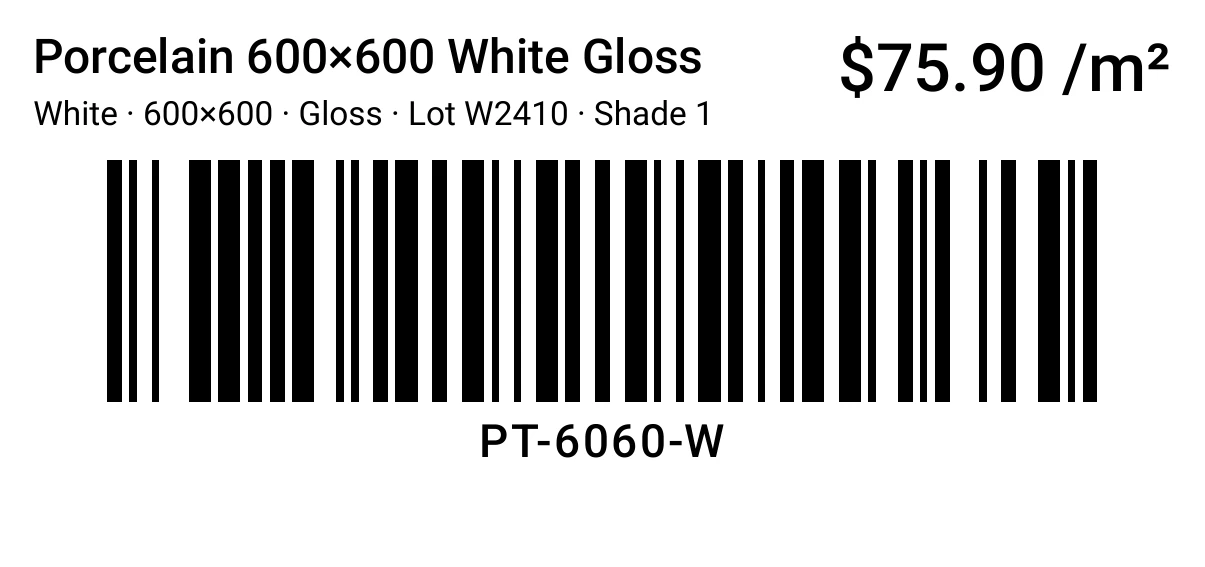
Print stick-on barcode labels for products that have no barcode, or when you label your own stock. Products with their own barcode (EAN) get it; the others get their SKU as a barcode — the till, Packing and search find a product by it. Two sizes: 40 × 28 mm and 102 × 48 mm.
Print barcodes
- Add products to the barcode list with + Barcode: on Products each row has a + (or Add N shown for every product on the page), and a product's page has + Barcode at the top. The list stays while you move around.
- Press Barcodes at the bottom of the screen to open the list. Type or scan more products there (the same product again = one more label) and set how many labels each needs with − / +.
- Choose 40 × 28 mm or 102 × 48 mm, and tick Show the price if the label is for the shop floor (the selling price including GST).
- Press Print N labels. The labels open in a new tab: press Print and choose the label printer. When they are all printed, press All printed — clear the list.
The printer (once)
- Set up the Zebra or TSC driver as for package labels (see Package labels under Delivery): Printing preferences → paper size 40 × 28 mm or 102 × 48 mm, labels with gaps.
- In Chrome's print window choose the label printer, Margins: None, Scale: 100. Chrome remembers it.
Delivering
Deliveries and pickups, the delivery calendar and packing from the office.
Deliveries and pickups
- On an issued invoice, under Deliveries & pickups, press New delivery (or New pickup when the customer collects).
- Choose the date, freight company, con note and contact. Copy from invoice fills in the customer’s address.
- For each line, choose the rack to pick from and how much goes now. Untick lines that are not going.
- Choose the Driver if you know who takes it — the driver’s link is made at once (Deliveries add-on). You can also choose or change the driver while packing, or while it is on the truck.
- Press Schedule delivery. The goods are now scheduled: still on hand, but nobody else can sell them.
- The warehouse packs it on the phone (see the phone guide). Each packed line shows ✓ Packed, and the delivery then says Packed.
- When the truck leaves, press mark dispatched. For a pickup, press mark picked up: type the name of the person collecting, let them sign (with the mouse or a finger on a touch screen) and add at least one photo, then Confirm picked up. The stock leaves now.
- Print or share the packing slip — it shows the lot and shade of every box.
Drivers and proof of delivery (Deliveries add-on)
Your drivers record each delivery on their phone: who received it, photos and a signature. Outside drivers use a link — no sign-in, nothing to install. Your own drivers can have a login and see their run in My deliveries.
Set it up
- The Owner opens Settings → Plan & billing, ticks Deliveries add-on (3 drivers included) and adds Extra drivers if you have more.
- Add your drivers in Settings → Delivery → Drivers: name, email (for the link) and mobile. You can also add one while setting up a delivery.
- Staff who drive for you: add them in Settings → Staff with the role Driver. They are matched to the drivers list by their email.
The order of the work
- Set up the delivery and choose the Driver. The driver’s link is made at once.
- The warehouse packs every line and presses Confirm packing.
- Send the link: Email link to … on the delivery or the Packing screen, Share… or Copy link — or the driver scans the DRIVER QR on the packing slip.
- Press Dispatched when the truck leaves. The delivery says On the truck.
- At the customer the driver saves the proof. The delivery says Delivered.
Change the driver
- Choose another driver on the delivery or on the Packing screen — also while it is on the truck, until the proof is saved.
- The previous driver’s link stops working and a new one is made for the new driver.
- Press Cancel link to stop a link. The packing slip then prints without the QR until you make a new one.
Follow the deliveries
- Sales → Deliveries and the Delivery calendar show On the truck (dispatched, no proof yet) or Delivered, with the driver.
- Today has an On the truck card for the last seven days.
- Open a delivered one: Proof of delivery shows who received it, when, the photos and the signature, “from the driver’s phone”.
When it could not be delivered
- At the site the driver presses Couldn’t deliver?, picks why (nobody there, could not get in, refused, wrong address, damaged, other), adds a note and photos.
- The delivery says Not delivered in Deliveries, on Today and in My deliveries. Nothing moves by itself.
- Open it and choose: Try again — it stays on the truck and the same link saves the proof next time; or Back to stock… — choose the new day, the goods go back to the shelf they left from and the delivery is Scheduled again (lines, packing and driver kept).
Emails to the customer
- Open Settings → Delivery → Emails to the customer and tick the ones you want: On its way, Delivered, Could not deliver.
- They go to the delivery’s contact email, else the customer’s — from “<your company> via Lotwisely”, and replies come to your company email.
- To leave one delivery out, untick Email the customer about this delivery on it. The delivery shows which emails were sent.
Driver’s location (optional)
- Tell your drivers first. Then an Owner or Admin opens Settings → Delivery → Driver’s location, ticks We have told our drivers… and presses Switch on.
- From then on the driver’s page says that the location is recorded, and the phone asks the driver once.
- The location is taken only at the moment the driver presses Delivered — save or Save — not delivered — never in between.
- On the delivery you see Location when saved, how exact it was and Open in Maps.
Addresses on the map
- With the Deliveries add-on, the address fields suggest addresses from Google as you type (from 4 letters): a customer’s address, their sites, Ship to, the delivery’s Shipping address, walk-in Bill to and + Add a new customer.
- Pick one: the address is written the way Google has it (without the country) and its point on the map is kept. Under the field it says 📍 On the map · Open in Maps.
- Typing your own words still works — the address is saved as typed and says Not on the map. Pick it from the suggestions to put it on the map.
- The point belongs to the address itself, so the same address on a customer, a site, an invoice or a delivery is on the map everywhere. A delivery shows 📍 Map next to its address.
Delivery charges by zone, and what delivery really costs
Charge delivery by postcode zone without looking it up, then see what each delivery really cost you — so free and cheap deliveries stop hiding in your margin.
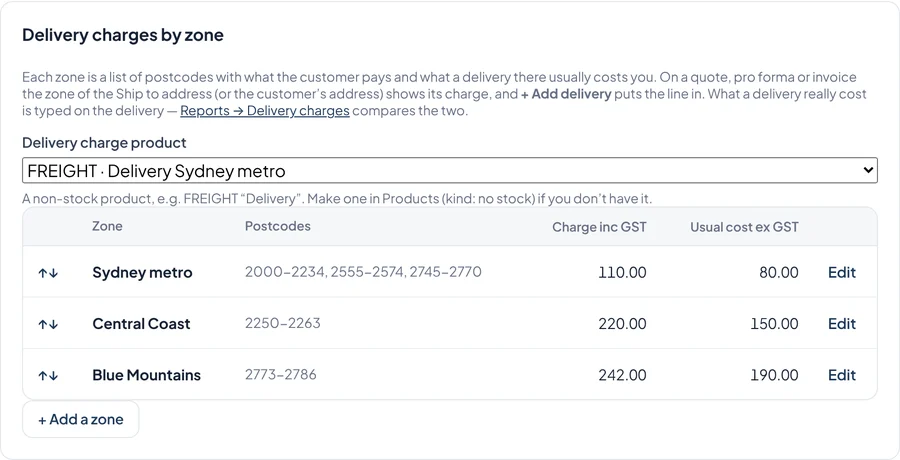
Set up the zones
- Open Settings → Delivery → Delivery charges by zone (Owner or Admin).
- Choose the Delivery charge product — a no-stock product such as FREIGHT “Delivery”. Make one in Products first if you don’t have it.
- Press + Add a zone: a name, the Postcodes (ranges and single postcodes, e.g.
2000-2234, 2250, 2256-2263; in the UK a prefix such asSW*), the Charge inc GST the customer pays and the Usual cost ex GST a delivery there costs you.
On a quote, pro forma or invoice
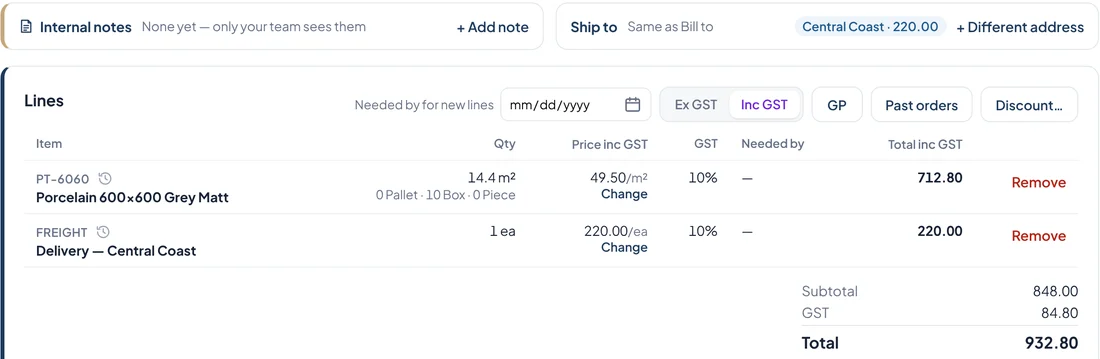
- The Ship to bar shows the zone and its charge for the Ship to address — or the customer’s address when there is no Ship to.
- Press + Add delivery. A line Delivery — <zone> goes in at the zone’s charge.
- Change the price like any other line if this job is different. The button doesn’t show once the document has a delivery line.
Type what the delivery really cost
- Open the delivery (not a pickup) and find Delivery cost. It shows the zone and its usual cost.
- Type the Actual cost ex GST — the carrier’s invoice, or what the truck run cost — and a note such as the carrier’s invoice number. Press Save cost.
- You can do it any time: after the truck has left, after the invoice is paid. Clear goes back to the usual cost.

See what you make on delivery
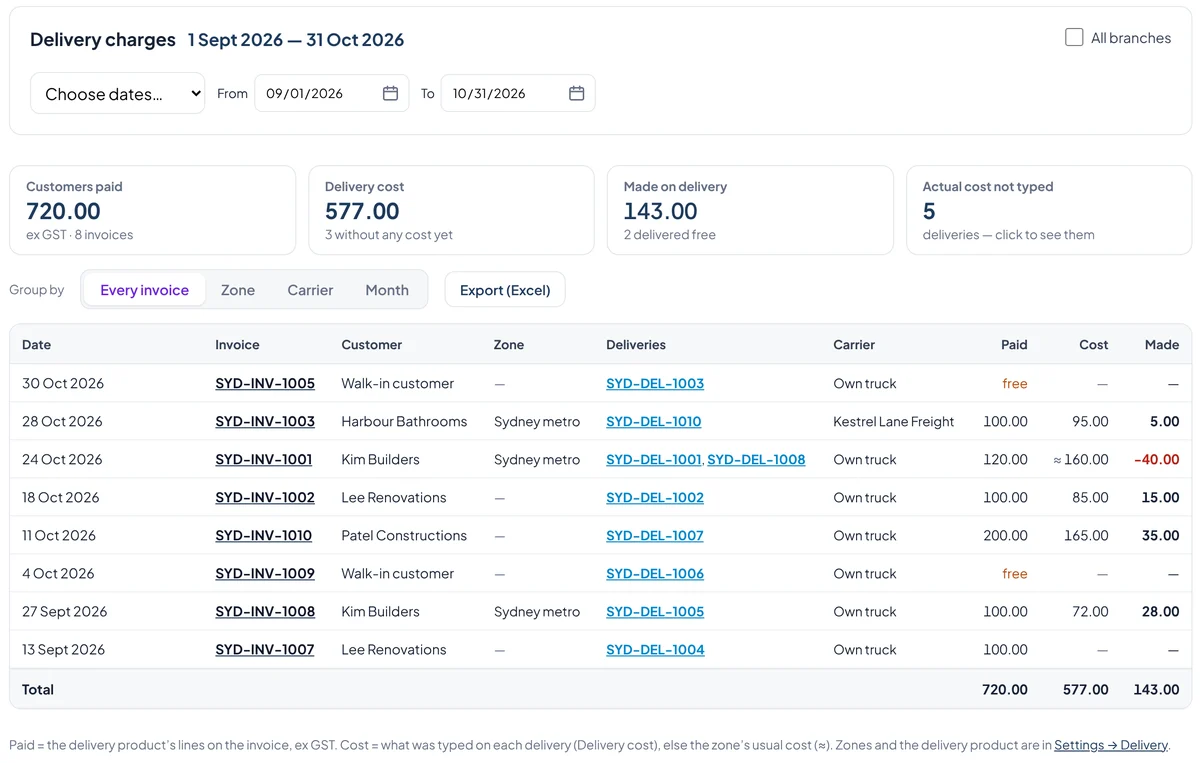
- Open Reports → Sales reports → Delivery charges and choose the dates.
- Each invoice shows what the customer paid for delivery, what it cost and what you made. free marks deliveries the customer didn’t pay for.
- Group by Zone, Carrier or Month, or click Actual cost not typed to see the deliveries still waiting for the carrier’s invoice. Export (Excel) for your accountant.
Delivery calendar
The week’s deliveries and pickups as cards, one colour per freight company.
- Open Sales → Delivery calendar (or the Calendar tab on Deliveries).
- Press This week, +1 week … +4 weeks, or ‹ › for the weeks before and after.
- Each card shows the freight company (or Pickup / Our truck), the units and the invoice’s note (the job), the address, and the customer and invoice number. Click it to open the delivery.
- To move a scheduled delivery, drag the card to another day.
Warehouse board (TV)
A TV in the warehouse showing today’s deliveries and pickups that still have to go out — late ones in red at the top. Part of the Plus plan and Multi-site.
Set it up
- Open Settings → Warehouse boards (Owner or Admin) and press Add a board — give it a name (e.g. Warehouse TV) and the branch.
- Press Link and copy the address (or press Open it here to see it first).
- On the laptop connected to the TV, open the link in Chrome. No sign-in is needed.
- Click once anywhere — it goes full screen.
Full screen every time (Windows)
- Right-click the desktop → New → Shortcut.
- Paste as one line, with your board’s link:
"C:\Program Files\Google\Chrome\Application\chrome.exe" --kiosk "https://app.lotwisely.com/board/…"— name it Warehouse board and press Finish. - Open the board with this shortcut: full screen, no address bar. Close it with Alt + F4.
- To start it when the laptop starts: Win + R, type
shell:startup, and copy the shortcut into that folder.
What it shows
- At the top: Late, Waiting, Packing, Packed and Done today, with the branch, the date and a clock.
- One row per delivery or pickup: Date, Type, Invoice No, Reference (the invoice’s job note), Customer and Status — Waiting (nothing packed yet), Packing 3/5 (lines packed so far) or Packed (ready to go).
- Late ones — their day has passed and they haven’t gone — are red at the top, with how many days.
- When a delivery is dispatched or a pickup is picked up, it leaves the board at the next refresh (every 30 seconds). New ones light up for a moment.
- When there are more than fit, the board turns the page every 10 seconds (Page 1 of 3).
Packing and pickups: from the office
Packing happens on the phone in the warehouse. From the computer you print the shelf labels, see what is packed and look up who collected what.
Print shelf labels
- Open Stock and press Print shelf labels (or Download) at the top. You get a label for every lot on every shelf in the branch — eight to an A4 sheet.
- For one product, open it on the Stock screen and press Print labels · SYD under its lots.
- Stick each label on the rack where that lot sits. The QR code holds the lot and the shelf; the label also shows the shelf code, SKU, lot and shade.
See what is packed
- Open Sales → Deliveries. Each delivery or pickup shows Scheduled, Packed, Dispatched or Picked up.
- Open one: it says Packed with the time, Packing: 1 of 2 lines packed, or Not packed yet. Each line shows ✓ Packed or Not packed. Open on the Packing screen shows the packing view.
- A packed line is locked on the delivery. To change it, unpack the line on the Packing screen, change the delivery, and pack it again.
Proof of pickup
- Open a pickup that has gone. Proof of pickup shows who collected it, when, their signature and the photos.
- Click a photo to enlarge it; use the arrows for the next one.
- Press Download images to save the photos and the signature, named after the pickup (e.g. SYD-DEL-1009-photo-1.jpg).
- Press Print pickup slip or Download for a PDF with the name and signature on it.
Package labels: Zebra and TSC label printers
Print a label for every box or pallet that goes: who it is for, the address, the invoice and delivery numbers, the carrier and con note, 1 of 3, 2 of 3… and a QR code. No prices. Three sizes: 100 × 150 mm (the usual shipping label), 100 × 100 mm and 100 × 50 mm.
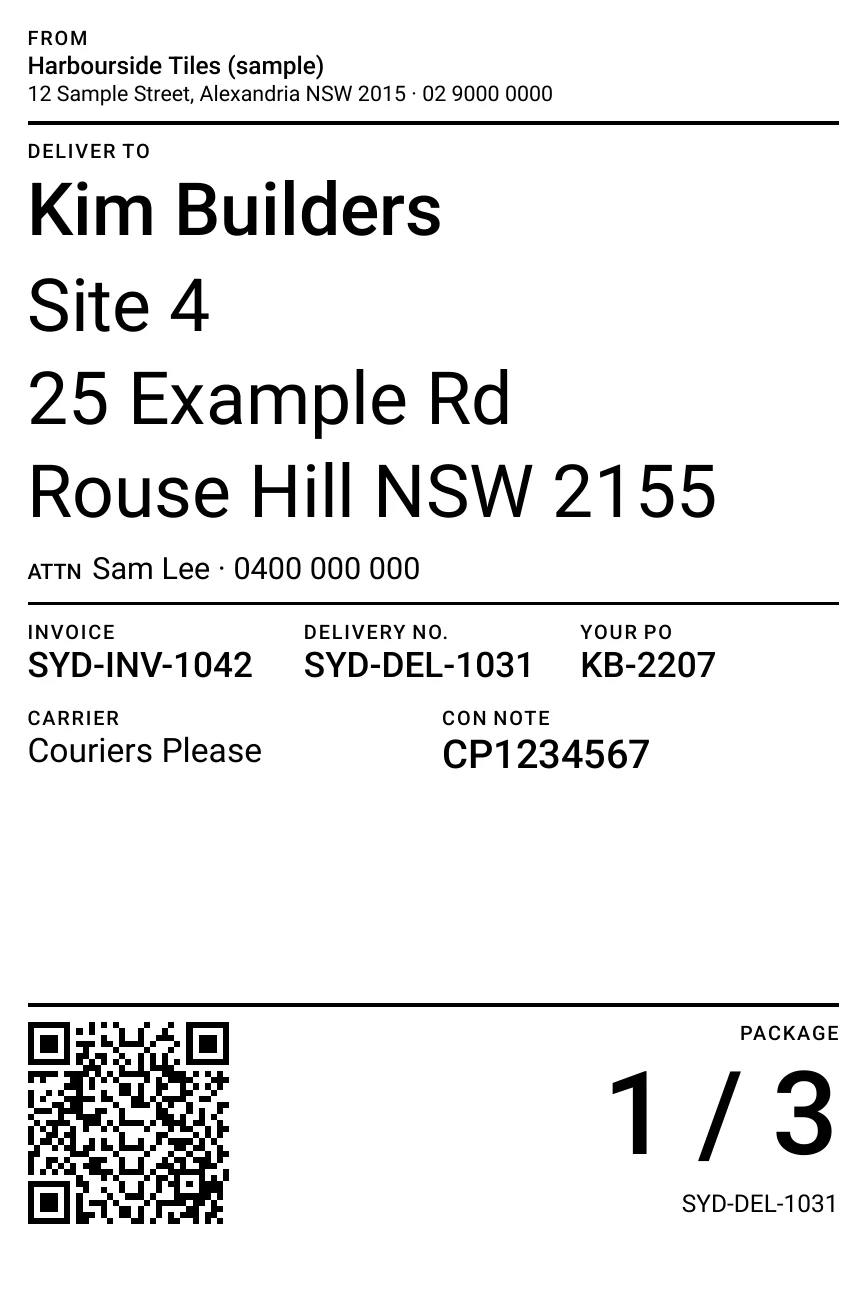
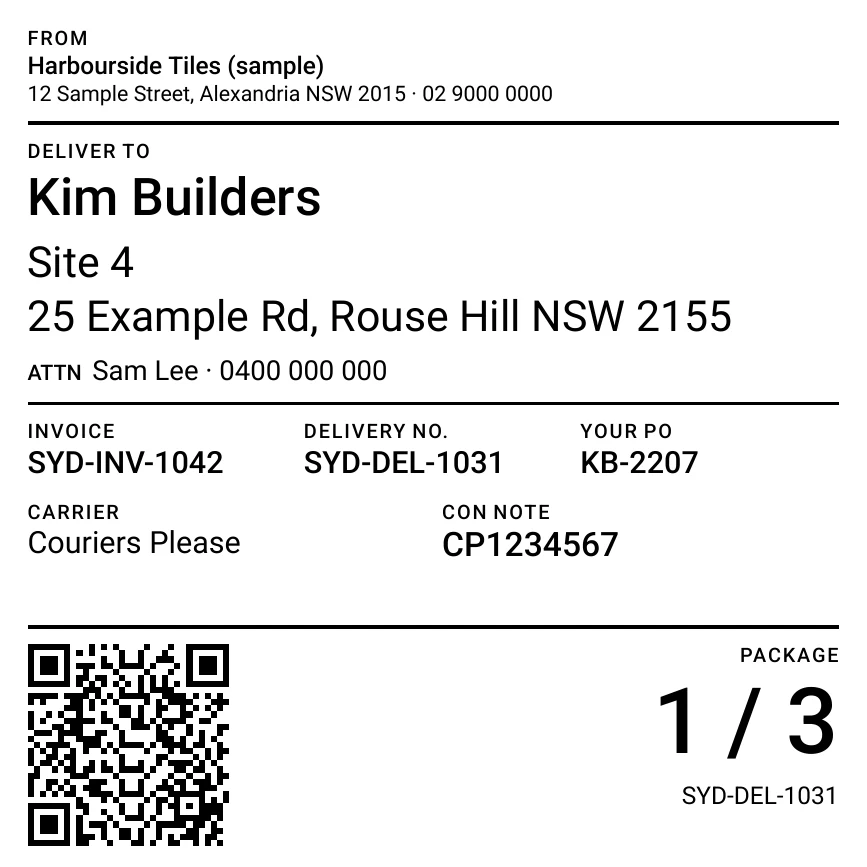
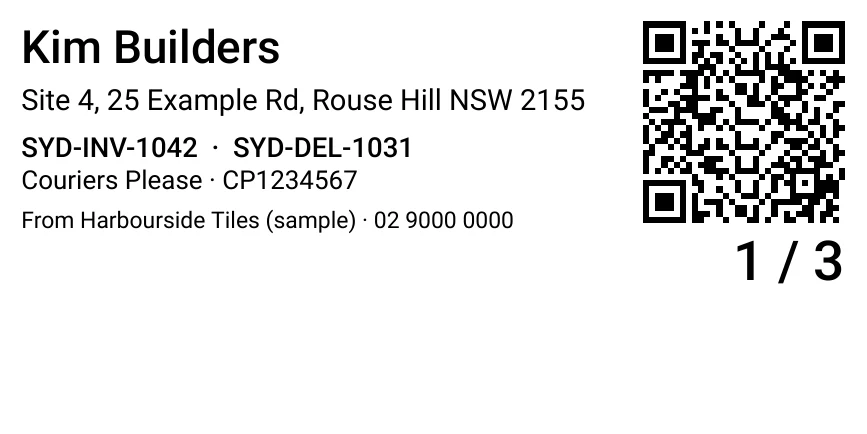
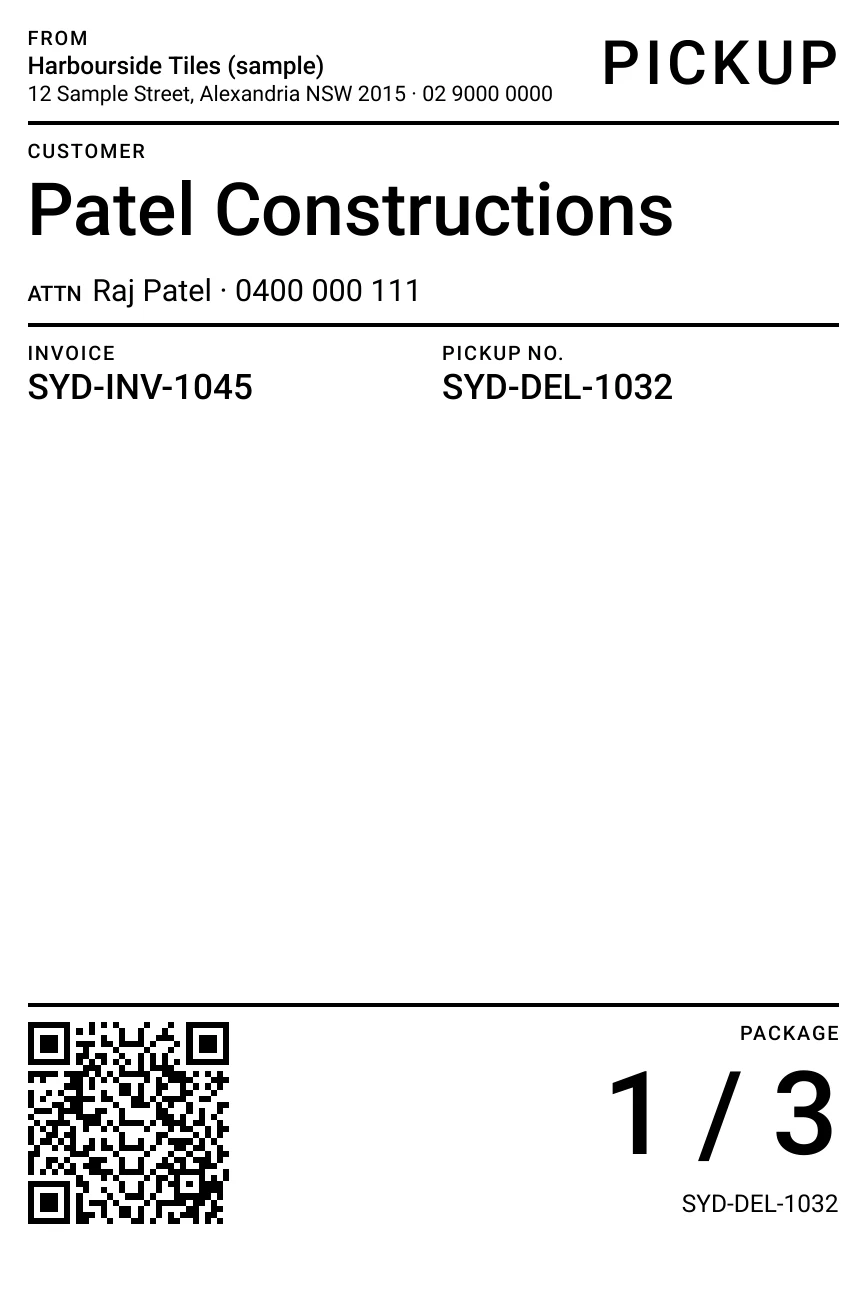
Print the labels
- On the Packing screen press Print labels — any time while packing, or the big Print labels button after Confirm packing. On a delivery, it is next to Mark dispatched (and next to the packing slip once it has gone).
- Type How many packages? The first time it is empty; the number is saved as the delivery’s Units, so next time it is there. You can still change it after dispatch.
- Choose the size and press Print 3 labels. The labels open in a new tab: press Print and choose the label printer.
Set up the printer on Windows (once)
- Plug the Zebra (e.g. ZD421) or TSC (e.g. TE210) printer in with USB and install its Windows driver from the maker’s website (Zebra: ZDesigner driver; TSC: TSC Windows driver).
- Open Settings → Bluetooth & devices → Printers & scanners, click the label printer and open Printing preferences.
- Set the paper (label) size to your labels — 100 × 150 mm (4 × 6 in), 100 × 100 mm or 100 × 50 mm — and the media type your labels need (Zebra: Labels with gaps; TSC: Labels with gaps). Press OK.
- If the labels are new, run the printer’s calibration (Zebra: hold the feed button until it flashes twice; TSC: the Calibrate button in the driver’s Tools), so it finds the gap between labels.
Chrome print settings (once)
- In the print window choose the label printer as Destination.
- Open More settings: Paper size = the label size, Margins = None, Scale = Default or 100. Untick Headers and footers.
- Press Print. Chrome remembers the printer and the settings for next time.
Buying
Purchase orders and ETAs, receiving goods and supplier bills.
Purchase orders and ETAs
- Open Purchasing → Purchase orders and press New PO. Choose the supplier and the ETA (when you expect the goods).
- Press Create PO, then add lines: product and quantity in pallets, boxes or pieces.
- Press Email to send it to the supplier, or Print PO / Download. Then press Mark as sent to supplier (emailing marks it as sent for you).
- If the ship is late, change the ETA and give a reason. Every change is kept.
- Under How it arrives choose Supplier delivers, Self pickup — we collect or Self pickup — the customer collects (your customer goes to the supplier with your PO). For a self pickup the ETA becomes the Pickup date.
Automatic reorder: Min and Order up to
Set two levels on a product for each branch. When what the branch can sell plus what is already on order drops below Min, Lotwisely adds the difference up to Order up to — in whole boxes — to the main supplier’s draft purchase order. Nothing is sent by itself: you check the draft and send it.
- Give the product a Main supplier (top of the product page) — the automatic order goes to them.
- Scroll down to Reorder levels. Each branch has a row with Can sell + on order (what it can sell now, what is coming, and what is already on a draft PO).
- Type Min (when to order) and Order up to (how much to have after ordering), then press Save. If it is already below Min, the draft PO is made at once.
- When it happens, Today shows Automatic orders to check, and the purchase order list shows an Auto tag on the draft.
- Open the PO. Made by the automatic reorder says why each line is there (e.g. can sell + on order 141 m², below Min 500 → +659.52 m²). Change the quantities or ETA if you need to, then Email it or press Mark as sent to supplier.
Suppliers you order on their website (portal)
Some suppliers give an extra discount when you order on their own website. You still make the purchase order in Lotwisely, so stock, ETAs and bills work as usual — it just isn’t emailed.
- Open the supplier, press Edit details, set How we order to On their website (portal) and paste the Portal address.
- A purple Portal tag now shows beside the supplier in the supplier list, on their page and on their purchase orders in the PO list. Their page also has an ORDERS ON PORTAL stamp with Open portal ↗.
- Make the PO as usual. Instead of emailing it, press Open portal ↗, place the order on their website, type their order number and press Ordered on portal.
- The PO is now sent, and their order number shows under Their ref. When the goods arrive, receive them and import the PO into the bill exactly as before.
PO calendar
When goods come in and go back: every purchase order on its ETA or pickup date, every receipt on the day it arrived, and every return to supplier on the day it goes.
- Open Purchasing → PO calendar. Press This week, +1 week … +5 weeks, or ‹ Previous week.
- Light green = the supplier delivers. Light orange = self pickup (we collect, or the customer collects). Grey = received. A faded card is a draft not sent to the supplier yet.
- Returns to supplier (↩): rose = the supplier picks it up from us, violet = we take it back. Grey ↩ = gone back. Faded = not approved yet.
- Container orders (🚢) are deep navy, at the top of their day, with the container number.
- Click a card to open the PO (or the receipt, or the return).
- Type in Search — supplier, PO number, container number, reference or note. Matching cards light up; matches in other weeks are listed — click one to go to its week.
Containers and landed cost
Mark the purchase orders that come in a shipping container, then add what it cost to get the goods to your shelf — freight, customs, transport, unloading, duty — so the stock cost and your GP are the real ones.
Container orders (every plan)
- On a purchase order, tick 🚢 Container order and type the Container no. if you know it (for example MSCU4821937). Press Save.
- The Orders list shows 🚢 and the number next to the PO number; search finds the container number too.
- On the PO calendar (Plus) the container is a deep navy card at the top of its day.
Landed cost (Plus)
- Open the container’s purchase order once it is sent. The Landed cost card is under Bills.
- Type what each cost came to, ex GST: Sea freight, Customs clearance, Container transport, Unloading — shared By m² — and Duty — shared By value, because duty is a % of the goods. + Add a cost for anything else (port charges, fumigation …).
- Tick Estimate on a cost you don’t have the bill for yet.
- The table shows each product: what the supplier charged per unit, + Landed, and Landed / unit.
- Press Apply to the stock cost. From now on the stock value, the GP on invoices and the sales reports use the landed cost — for sales already made from those lots too.
- When the real bills come in, change the amounts, untick Estimate and press Update the stock cost.
Receive goods and the bill — why two steps
In many systems you start by typing the supplier’s invoice. In Lotwisely the goods come first: Receive goods records what arrived, and the bill — what you owe — is made from it. That way the warehouse can receive on a phone without seeing any prices, and the stock is right the moment the goods are on the shelf.
Two documents, two jobs
- Receive goods (the receipt, e.g. SYD-REC-1023) is about the goods: which products, how many, which lot and shade, which shelf. It puts the stock on hand and updates the purchase orders. Warehouse staff can do it on a phone, and they see no prices.
- The bill is about the money: the supplier’s invoice number, the costs, GST, freight or customs, and the due date. It is what you pay in Bill payments and what goes to Xero or QuickBooks. Owners, Admins and Sales see it.
- You don’t make a bill on its own. Pressing Receive makes it, with the receipt’s number, the costs from the purchase order (or the product’s cost) and the supplier’s GST.
The usual order: goods first, then the bill
- The goods arrive. The warehouse opens Receive goods, imports the PO, types the lots and shelves and presses Receive — on a phone or a computer.
- The office opens Purchasing → Bills, or Open the bill on the receipt. When the supplier’s invoice comes, drop its PDF on the bill (or forward the email to the Invoice inbox) and type their invoice number and the due date.
- Check each cost against the invoice. Choose Costs are typed: Inc GST to type them as printed on the invoice — Lotwisely keeps them without GST. Add freight or customs with + Add a charge, and press Save bill.
- When it is due, press Pay this bill (or use Bill payments).
When the invoice comes before the goods
- The office starts the receipt: Receive goods → New receipt, the supplier, Import all from the PO, their invoice number, the due date and the costs (Inc GST if you like — or Fill from the paperwork to let the AI read the invoice). Press Save draft.
- When the truck comes, the warehouse opens the draft — it waits in Receive goods and under Receipts in progress on Today — types the lots and shelves, and presses Receive. The bill is made with the costs the office typed.
Receive goods
A receipt is a document like an invoice: the office can start it, the warehouse finishes it on a phone at the container.
- Open Purchasing → Receive goods and press New receipt (or press Receive goods on a purchase order).
- Choose the Supplier. Their open purchase orders appear — press Import all, or + add on single lines. One delivery can bring several POs.
- Add anything that was not on a PO: type part of the name, SKU or barcode in Add a product, or press Scan and point the camera at the box label.
- For each line, type the Lot no. and Shade from the box, choose the Location and check the quantity. Use + another lot when one line came in two lots.
- Fill in Their invoice / delivery no. and Payment due if you have them. Save draft to finish later.
- Press Receive. The stock is on hand, the POs are updated and the bill is made.
- Once received (or once the draft is saved), press Take a photo under Delivery note to snap the paper that came with the goods — or add its PDF. The bill shows it too.
Bills, supplier returns and bill payments
Bills
- Every receipt becomes a bill. Open Purchasing → Bills to see what you owe, due dates and what is overdue.
- Open a bill to fix a cost, add freight or customs as an extra line, and enter the supplier’s invoice number. Press Save bill.
- Drop the PDF from the supplier’s email (or a photo) on Supplier’s invoice. The delivery note from the receipt shows underneath, so price and quantity are checked on one screen. With Xero or QuickBooks connected, the PDF is attached to the bill there too.
Return to supplier
- From a bill: open it and press Return to supplier, then choose the lines, quantities and lot going back, or a price-only credit.
- Without a bill: open Purchasing → Supplier returns and press New return. Choose the supplier, then add the products going back straight from stock — pick the lot and shelf (each shows how much is there and which supplier it came from) and the boxes. The cost fills in from the bill the lot came on; you can change it.
- Each line has a Disc %. If the supplier keeps a Restocking fee, type it in its box as a % of the goods or a $ amount — rename it if they call it something else (e.g. Handling fee). The credit is worked out after the fee, then GST, and the return PDF shows “Less: Restocking fee 15%”.
- Under How it goes back, choose Supplier picks up (they come and collect it) or We take it back (our own truck), the day, their return number (RA) and a note. It shows on the PO calendar on that day.
- An Owner or Admin presses Approve. The goods stay on their shelf but are held for the supplier — nobody can sell them — and nothing is credited yet.
- On the day, Sales or the warehouse press Picked up by the supplier (or Taken back). Now the stock leaves and the credit comes off the bill; anything left over is supplier credit.
Pay bills
- Open Purchasing → Bill payments and press Pay bills (or Pay bills on a supplier’s page).
- Choose the supplier, the date, method and reference, and how much goes on each bill. Use supplier credit first if there is any.
- Press Save bill payment.
Invoice inbox: supplier invoices by email
- Open Purchasing → Invoice inbox (Owners, Admins and Sales). At the top is your company’s own address, e.g. *yourcompany-7k2@bills.lotwisely.com*. Press Copy.
- Keep using your own email with suppliers — nothing changes for them. Forward an invoice email to the address when you like, or add one rule to your mailbox so they come by themselves (Gmail: Settings → Forwarding and POP/IMAP → Add a forwarding address, then a filter on your suppliers with “Forward it to”; Outlook: Rules → Forward to).
- Gmail first sends a Forwarding Confirmation email to the address. It shows up in the Invoice inbox — open the link in it to confirm.
- Each email shows its PDFs and photos. Lotwisely knows the supplier from the sender (their email in Suppliers) and suggests the bill — first the one whose Their invoice no. is in the subject or file name, then the supplier’s unpaid bills. Press Attach to … and the file is on the bill (and goes to Xero or QuickBooks with it).
- An invoice that comes before the goods waits in the inbox. When the goods are received, the bill shows it under Waiting in your invoice inbox — press Attach here.
- Owners and Admins can tick Attach by itself when the invoice number matches exactly one bill. Then most invoices need no click at all — even ones that arrive before the goods.
Money, reports and connections
Payments, credit notes, statements, reports, sales targets, PDFs and email, and AI.
Customer payments
- Press Receive payment on an invoice, on a customer’s page or under Sales → Customer payments.
- Choose the date, Method and reference. Type the Amount received — it is spread over the open invoices, oldest due first. Or type an amount on each invoice.
- To use a credit note or a deposit on an invoice, pick it under Use credit… on that invoice.
- Press Save payment. Invoices that are covered show Paid.
Credit notes, returns and refunds
Use a credit note when goods come back, when part of an order is no longer wanted, or to correct a price after payment.
- Press New credit note on the Credit notes list (or Create new → Credit note). Which sale? — type the invoice number, the customer’s name, phone or email, the job note or a product, or pick one of the latest invoices. (From an open invoice, New credit note goes straight there.)
- Give the reason. Cancel — not delivered: how much of the undelivered part is no longer wanted. Its reservation is released.
- + Goods returned: the lot, how much, the condition, and where it goes. Good — back on sale goes back on the shelf in the same lot; Faulty — not for sale goes to a not-for-sale location.
- Price adjustment: a money-only credit.
- Press Save for approval. An Owner or Admin checks it and presses Approve & post.
- The credit first pays down its own invoice. Anything left is customer credit: Use on another invoice, or Refund as money — choose how it goes back and Record refund.
Customer statements
A statement shows the opening balance, every invoice, payment and credit of the period with a running balance, the ageing by month, what is still open and how to pay.
Email statements to many customers
- Open Sales → Statements. Choose the period — This month, Last month, Last 3 months, This financial year — or the dates.
- Choose who to show: Balance due, Overdue, In credit, Not zero or All customers. Each customer shows the ageing (Current, the three months before, Older), the balance, overdue and when a statement was last sent.
- Tick the customers (or the box at the top for all) and press Email statements.
- Check the subject and message. {customer}, {balance_line}, {period} and the others are filled in for each customer. Press Send.
- Each customer shows Sent ✓. Customers without an email are skipped — add their email on the customer and send again.
One customer
- Open the customer (click their name in Statements or in Customers).
- Press Print statement, Download, or Email statement and choose the period.
Payment reminders and monthly statements by email
- Open Settings → Reminders & statements (Owner or Admin). Tick Email payment reminders and type the days, counted from the due date — minus is before it is due. The usual is -3, 7, 14, 30: “Due soon”, then “Payment reminder”, “Second reminder” and “Overdue account”.
- Tick Email last month’s statement every month, choose the day (e.g. the 1st) and who gets one: customers who owe money, also those in credit, or also anyone with activity that month.
- Choose A person checks them first (recommended to start) or Send them by themselves, and press Save. Check now makes today’s emails straight away.
- Every morning they wait on Today and in Sales → Reminders & statements — one card per customer, which is one email. Untick any you don’t want to send and press Send, or Don’t send these.
- The customer gets one email with the invoices, what they owe in all, how to pay and a View your account button: their balance, what is overdue and the statement PDF — no sign-in needed. The link works for 60 days.
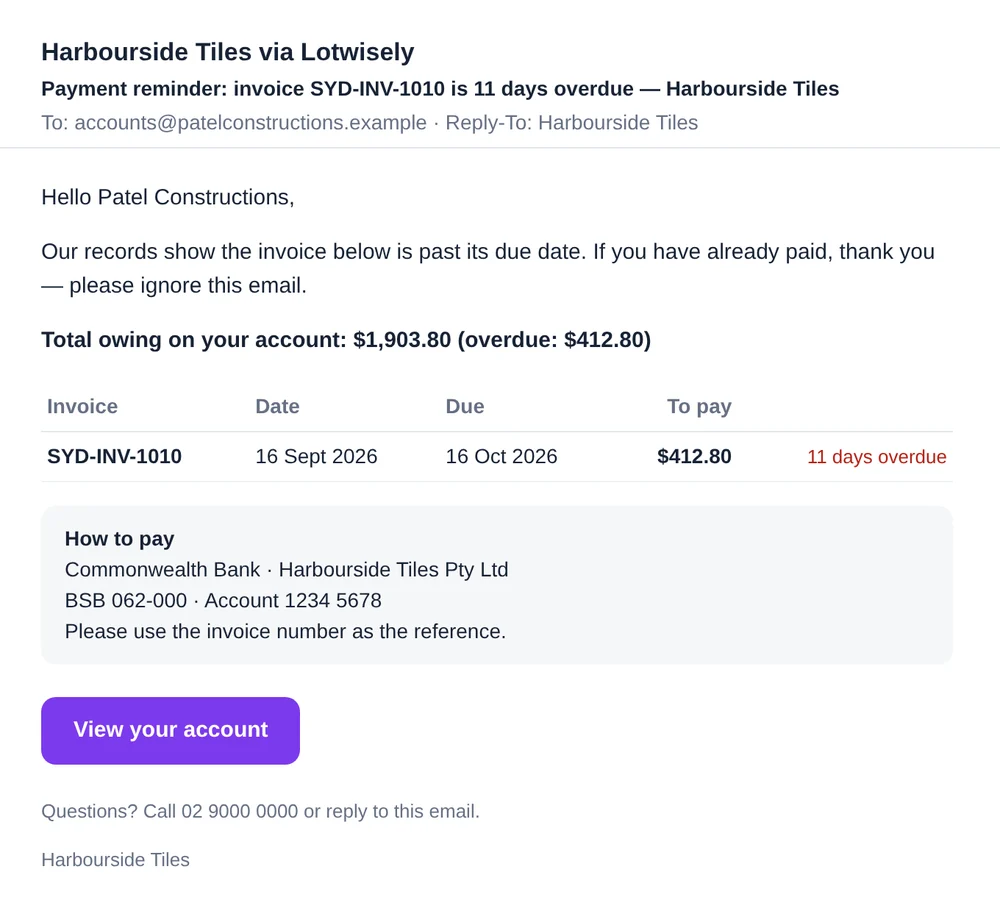
Cash summary
Reports → Cash summary is the cash-up: sales for the dates you choose, and every dollar in and out by payment method.
- Open Reports → Cash summary.
- Choose the period from the list — Today, This week, Last month, This financial year… — or Choose dates… for your own From and To.
- The top shows Sales, Credit notes and Net sales. Below, Cash-up by payment method shows received, refunded and net for each method.
- Click a method to see its payments. On a computer, press Print.
Sales, inventory and purchase reports
Sales reports
- Open Reports → Sales reports. Choose the dates and Group by: customer, customer group, product, lot, category, supplier, salesperson, month or branch.
- Click a row to see every invoice behind it. Invoice margin shows the GP of each invoice; tick GP under 20% only to find the thin ones.
- Tax summary gives sales and tax by rate; Cancelled invoices lists what was called off.
Inventory reports
- Open Reports → Inventory reports. Stock valuation shows what your stock was worth on any day, by product, lot, location, category, supplier or branch.
- Slow-moving lots and Remnant lots show what to sell first; Stock movement shows opening, in, out and closing for a period; Adjustments & damage lists stocktake changes with their value.
Purchase reports
- Open Reports → Purchase reports for purchases by supplier or product, Open PO lines still to arrive, Aged payables (what you owe suppliers by month), Supplier costs (how prices changed) and the Tax summary.
Sales targets
Give each salesperson — and the whole company — a monthly target for sales and for gross profit, and see every day who is on pace.
- Owners and Admins open Settings → Team → Sales targets and choose the month.
- Type a Sales target (ex tax) and a GP target (gross profit in money) for the whole company and for each person. The GP % works itself out, and last year’s sales for the same month show beside them.
- Press Save, or Save and copy to the rest of the year to use the same numbers for every later month of the financial year.
- On the Dashboard, Sales targets shows everyone’s sales and GP against their target — this month, last month or the year to date. The dark tick on each bar is where they should be by today: on pace, behind pace or ✓ reached.
- Each salesperson sees My target at the top of Today: how far they are, what is left and how many days to go.
Sales hub and Purchase hub
All documents of a period on one list, each with its total, what is paid or used, and its balance.
- Open Sales → Sales hub (invoices, pro formas, credit notes) or Purchasing → Purchase hub (bills, supplier returns). It opens on This week.
- Choose another period, a type, Open only (balance left) or All branches. The totals on top follow.
- Click a row to open the document.
PDFs and email
- On a quote, pro forma, invoice, purchase order, credit note or a customer’s page (statement), press Print or Download (on a phone: Share).
- Press Email to send it with the PDF attached. The customer’s or supplier’s email is filled in; you can change the message — or keep your own wording (see Your own email wording below).
Files on quotes, invoices and purchase orders
Add a drawing, a photo or the customer’s PO
- Open a quote, pro forma, invoice, credit note or purchase order and go to Files at the bottom. On an invoice or pro forma, the Files chip in the bar at the top jumps there.
- Press + Add a file (on a phone: Take a photo or Choose a file), or drop a PDF or photo on it. Up to 10 files of 10 MB each; photos are made smaller by themselves.
- Tick With the email on a file the customer (or supplier) should get with the PDF. The others stay in Lotwisely for reference.
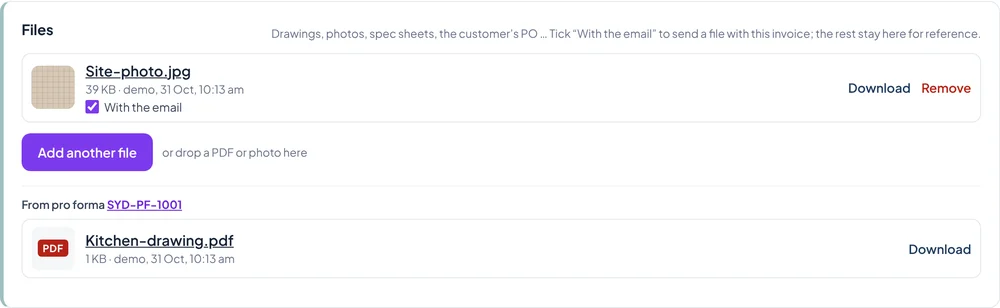
Your own email wording
For every email of a kind
- Open Settings → Selling → Email messages (Owner or Admin).
- Press Write your own next to Tax invoice, Quote, Pro forma invoice, Credit note, Statement or Purchase order. It starts from Lotwisely’s wording.
- Change the subject and message. Click a placeholder such as {customer}, {doc_no} or {due_date} to put it where the cursor is — it is filled in for each email. Preview with an example shows how it reads.
- Press Save. Every email of that kind now starts with it, and you can still change it in the Email window before sending.
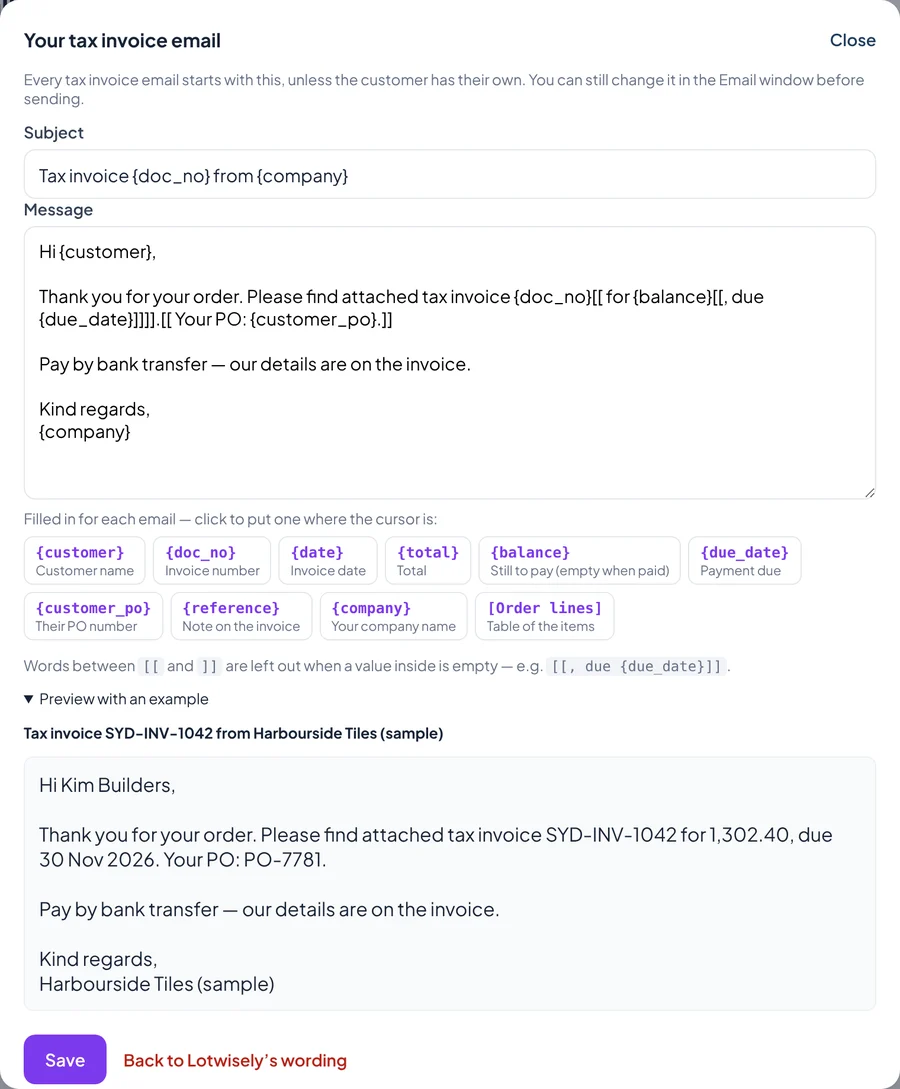
For one customer or supplier
- In the Email window, write the message the way this customer likes it, then press Keep this for … (their name).
- Lotwisely puts the placeholders back where the document’s own number, name and amounts were. Check them and press Save.
- From now on, emails to that customer — or purchase orders to that supplier — start with it. The line under the message says which wording you have: the customer’s own, your company’s, or Lotwisely’s.
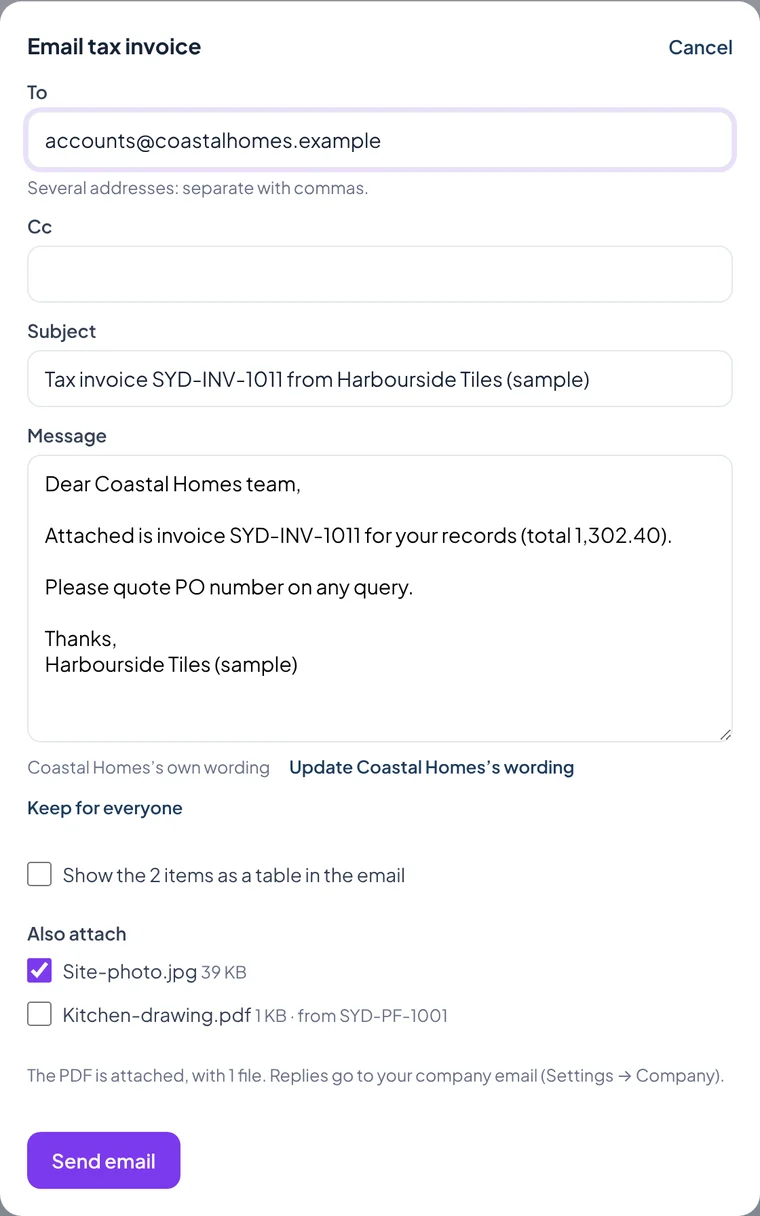
AI assistants (Claude)
- Open Settings → AI assistants and press Copy next to the connection address.
- In Claude, open Settings → Connectors, press Add custom connector, name it Lotwisely, paste the address and press Add, then Connect.
- Sign in to Lotwisely in the window that opens and press Allow.
- Claude asks before each question uses Lotwisely. To stop that, open Settings → Connectors → Lotwisely and set the read-only tools to Always allow — they only read, never change anything.
- Ask in plain words — e.g. “How much PT-6060 do we have in Sydney, by shade and shelf?”, “Can we supply 85 m² by Friday?”, “What is late today?”, “What does Coastal Homes owe?”, “Top 10 products by margin this year”.
Get Lotwisely on your phone
Install the Lotwisely app: from the App Store on an iPhone, from Google Play on Android. Sign in with the same email and password as on the computer.
- iPhone: install Lotwisely: Lot & Batch Stock from the App Store.
- Android: install Lotwisely: Lot & Batch Stock from Google Play.
- Open it and sign in with the same email and password as on the computer, then choose your branch.
- Allow notifications when the app asks. Warehouse staff get To pack when a pickup or delivery is booked for their branch (and when its date changes or it is cancelled); a driver gets Your delivery. Tap one to open it.
Finding your way
The phone shows the same company and branch as the computer, laid out for one hand. The app (iPhone and Android) opens on its start screen.
- At the top, Scan anything: a box, a shelf label, an invoice, a docket or a PO number — the right screen opens by itself.
- Under it, Warehouse: Packing, Receive goods, Stock, Received items and Stocktake.
- This week: Deliveries, In & out (POs due and returns going back) and Purchase orders. Sales & money: Invoices, Cash-up and Shifts (Sales and Owners).
- The big button at the bottom of a screen is its main action — scan, receive or save. The arrow at the top left takes you back.
Packing a pickup or delivery
Each line tells you where to go, which lot and how much. Scan the shelf label to pack it — Lotwisely checks it is the right lot on the right shelf.
TodayTomorrow+2 daysThis week
SYD-INV-1011Pick upTo packCoastal HomesTownhouses 1–3, 40 Dune RdToday · 2 lines
SYD-INV-1003DeliveryPackedHarbour BathroomsHallway and living, 3 Bay StToday · 1 line · Kestrel Lane Freight
▣ Scan a packing slip
1 / 7 · On the phone → in the office
Open the phone: today’s pickups and deliveries
Packing opens first. Each job shows the customer, the invoice and how many lines are packed. Pick another day, next week or what went last week with one tap.
DateNumberCustomerStatus
TodaySYD-DEL-1009PickupCoastal HomesScheduled0 of 2 packed
TodaySYD-DEL-1010DeliveryHarbour BathroomsPackedKestrel Lane · 2 units
TomorrowSYD-DEL-1008DeliveryKim BuildersScheduled0 of 1 packed
Proof of pickup shows here when the customer collects.
Find the job
- Tap Packing. You see today’s pickups and deliveries (and any late ones) with the invoice, customer and how many lines are packed, e.g. (0/2).
- Tap a button at the top to choose Today, Tomorrow, +2 days, This week or All open (swipe them sideways for more).
- Tap a job to open it. Or press the scan button at the top and scan the QR code on its packing slip, the customer’s docket or the tax invoice.
Pack each line
- Lines are sorted by shelf. Each one shows the shelf code in large letters (e.g. YARD), the lot and shade, and the quantity as Pallet · Box · Piece.
- Go to the shelf and press Scan shelf label (or the QR button on the line). Point the camera at the label on the shelf.
- The right label packs the line: it turns green with a tick and the bar at the top fills up. You can keep scanning the next shelves without closing the camera.
- The wrong label is refused with the reason — wrong lot or wrong shelf. Find the right shelf and scan again.
- No label on the shelf? Press Pack without scanning and confirm that you checked the lot on the box. It is recorded as packed by hand.
Confirm
- When every line is packed, press Confirm packing. The job is Packed — ready to go, and the office sees it.
- For a delivery, choose the Driver at the top if it is not set. Once packed, the driver’s QR and Email link to … show below the lines.
- The stock is still on hand until the job is dispatched or picked up.
- If your company keeps it for a Warehouse manager, you pack and the manager checks it: they press Confirm packing, then Dispatched — or, for a pickup, Picked up with the name, signature and photo. Your screen says a Warehouse manager checks it.
Dispatched and picked up
A delivery leaves on the truck
- Open the packed delivery. Check the date next to Dispatched on.
- Press Dispatched and confirm. The stock leaves now.
A customer picks up
- Open the packed pickup and press Picked up.
- Type the name of the person collecting (tap the contact’s name if it is them).
- Tap Tap to sign and hand them the phone: they sign with a finger, as big as they like. Clear starts again, Done keeps it.
- Tap Take photo and take at least one photo — the goods, the vehicle or the person. Take up to six; × removes one.
- Press Confirm picked up. The stock leaves and the proof is saved with the pickup.
For drivers: deliver and record the proof
Part of the Deliveries add-on. The driver sees where to go, who to call and what goes — never prices — and records the delivery.
With a link (outside drivers)
- Open the link in the email, or scan the DRIVER QR on the packing slip with the phone camera.
- You see the delivery: Open in Maps, Call the contact, the note and what goes.
- At the site, type Who received it? — tap the contact’s name, or Left on site.
- Tap Take photo: at least one photo of the goods where you left them, up to six.
- Let them sign with a finger if they can (optional).
- Press Delivered — save. You see Delivered ✓ with your photos and the signature.
With a login (your own drivers)
- Open the invitation email from Lotwisely, press Join and choose a password.
- Sign in on your phone: you see My deliveries — To do (today and late), Upcoming and Done.
- Use ↑ ↓ to put today’s run in your order.
- Press Deliver at each stop: the same proof screen opens. Back to my deliveries when it is saved.
If you can’t deliver
- Press Couldn’t deliver? under the proof.
- Pick why, add a note if it helps (needed for Other) and take a photo — the closed gate, the wrong number.
- Press Save — not delivered. The office decides what happens next. If it was delivered after all, save the proof as usual.
Jobs that have gone
- On Packing, swipe the buttons at the top to the end and tap Done.
- Closed jobs are found by the day they actually went, not the day they were planned for. They show Dispatched or Picked up, the date and who collected.
- Tap one to open it with its proof of pickup.
Receive goods on the phone
Stand at the container with the phone: the office can start the receipt and you finish it.
- Tap Receive goods. Open a receipt under In progress, or press + New receipt and tap the PO that came in (no PO? Choose the supplier). The lines still to come are brought in.
- Type Their invoice / delivery no. from the supplier’s paperwork.
- Press Scan boxes and point the camera at the barcode on a box — its line opens. Type the Lot number and Shade from the box, choose the Shelf (or Scan the shelf), check How many came and press Done.
- Two lots in one delivery? Lower the quantity, then + Another lot for the rest. A product without a barcode: Find a product (no barcode).
- When every line says Ready, press Receive. The stock goes in, the POs are updated and the bill is made.
Branch transfers on the phone
Pack a transfer like a delivery at the sending branch, and put it away with a scan at the receiving one. Not in the app yet: open app.lotwisely.com in the phone’s browser, or use a computer.
- Tap Packing. Branch transfers at the top lists what your branch has to send (To MEL) and what is on its way to you (From SYD).
- Sending: open it and scan the shelf label for each line — the wrong lot or shelf is refused — or press Pack without scanning. When everything is packed, press Send — on its way.
- Receiving: scan the QR on the transfer slip (or open it from the list). For each line scan any shelf label where you put it, or type the shelf code. Less came? Press Less arrived? and enter what is there. Then press Receive.
Check stock and lots
- Tap Stock. Search by SKU, name, supplier code or barcode — or press Scan a box or shelf label.
- Each product shows what is free to sell in your branch, with Pallet · Box · Piece, what is reserved, scheduled to go and coming.
- Under Lots and shelves you see every lot and shade, where it sits and what is free. Scan another for the next one.
Invoices on the phone
- Tap Invoices on the start screen. Search by number, customer, reference or PO — or press Scan an invoice or docket and scan its QR.
- Open one: what it comes to, what is paid and what is owing, then each line with what has gone, what is scheduled and what is still to arrange.
- Under Deliveries and pickups, tap one to open it in Packing. Call rings the customer.
- Quotes, new invoices and payments are made in the web app — on a computer, or at app.lotwisely.com in the phone’s browser.
Stocktake
- Tap Stocktake on the start screen. Open the stocktake (or press + New stocktake, name it and choose the shelves) and press Count.
- Choose the shelf, then scan the shelf label (or find the product) and pick the lot — + New lot if it isn’t in the system.
- Type Pallet · Box · Piece and press Save count. Next product.
- When you are done, press Finish counting. An Owner or Admin approves the differences.
Damage and moves
Not in the app yet: open app.lotwisely.com in the phone’s browser, or use a computer.
- Open More → Stock moves.
- Move: choose from and to, the product, lot and quantity, and post.
- Adjust: choose the reason (damaged, found…), add the products and the difference, and save. An Owner or Admin approves it. To count shelves, use Stocktake.
Today on the phone
Not in the app yet: open app.lotwisely.com in the phone’s browser, or use a computer.
- Open More → Today to see what is waiting in your branch — deliveries due, invoices that need lots, late purchase orders and receipts in progress.
- Tap a line to open it.
Still need a hand?
Tell us what you're trying to do and we'll get back to you, usually within one business day.